

Jam Thumbprints are one of my holiday standbys, but I could never settle for only one recipe. To declare one variation best of all would be to give up all hope of improvement. And if not to strive to better ourselves and our world, what is our raison d'être?
The last recipe for jam thumbprints I made was this one from the 12 Days of Cookies newsletter. I remember them tasting heavenly, buttery and delicious, but also being crumbly, a bear to store, and tricky to form.
On top of that, my cookies turned out huge. You never want huge cookies for the holidays because it leads people to only sample one. Then you feel like you worked your bottom off producing a cornucopia of delights for nothing.
For once, I feel like an America's Test Kitchen recipe actually solved real problems for me. Much of the time, I find their recipes needlessly fussy, especially for baking . . . though I own a ton of their cookbooks anyway. Nonetheless! This recipe creates a clear-cut procedure for turning out bite-sized butter cookies with perfectly centered, non-drippy jam centers.
Caveats? The dough cracks a lot. Maybe if you worked more quickly than I you would make the second depressions more smoothly. I don't mind the cracks much myself.
Second, the cookie part isn't as rich as other jam thumbprints I've tried. It's a bit drier, more floury tasting. Maybe it's the long baking time.

Still, people will not be left unsatisfied with these little jewels. For best results, follow the authors' recommendation and don't use jams with seeds. The crunch in my boysenberry specimens is distracting. Also, apple butter may be tasty, but it sure looks ugly as a filling.
The rest of my cookies runneth over with one of my perpetual favorite fillings, lingonberry jam. Mmm.

Because I still do not own a small, "teaspoon" sized cookie scoop, I could not make these the easy way. I opted to skip the inexact two-spoons method in favor of a technique borrowed from roll-making. I used my bench knife and scale to cut the dough into 48 nearly equal pieces.

It's not as exhausting as it sounds. Roll-out cookies are way worse. I swear.
I edited the recipe slightly for clarity. My additions are in [brackets].
Jam ThumbprintsSource: The America's Test Kitchen Family Baking Book
Yield: about 4 dozen cookies
½ cup seedless raspberry jam
2¼ cups (11¼ ounces) all-purpose flour
½ teaspoon salt
½ teaspoon baking soda
¼ teaspoon baking powder
12 tablespoons (1½ sticks) unsalted butter, softened
⅔ cup (4⅔ ounces) sugar
3 ounces (6 tablespoons) cream cheese, softened
1 large egg
1½ teaspoons vanilla extract
1. Heat the oven to 350 degrees. Line 2 large baking sheets with parchment paper. Fill a small zipper-lock bag with the jam. Whisk the flour, salt, baking soda, and baking powder together in a medium bowl.
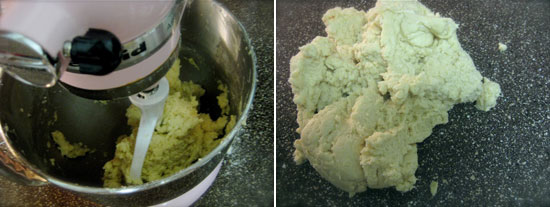
2. In a large bowl, beat the butter and sugar together with an electric mixer on medium speed until light and fluffy, 3 to 6 minutes. Beat in the cream cheese, egg, and vanilla until combined, about 30 seconds, scraping down the bowl and beaters as needed.
3. Reduce the mixer speed to low and slowly add the flour mixture until combined, about 30 seconds.
4. Working with 1½ teaspoons of dough at a time, roll the dough into balls and lay them on the prepared baking sheets, spaced about 1½ inches apart [four across on a standard half-sheet pan]. Make an indentation in the center of each cookie with your thumb.
5. Bake the cookies, on sheet at a time, until they are just beginning to set and are lightly browned around the edges, about 10 minutes. Remove the cookies from the oven and, working quickly, gently reshape the indentation with the bottom of a teaspoon measure. Snip a small corner off the bag of jam and carefully fill each indentation with about ½ teaspoon of the jam. Rotate the baking sheet and continue to bake until lightly golden, 12 to 14 minutes.
6. Let the cookies cool on the baking sheets for 10 minutes, then transfer to a wire rack and let cool completely, about 30 minutes, before serving.


No comments:
Post a Comment