Showing posts with label Shaped Cookies. Show all posts

Cookie Calendar: Pretzel Cookies

pretzel-cookies.jpg

Here's another variation on plain old icebox cookie dough. The recipe calls for vanilla or chocolate dough - I assume because they look most pretzel-like - but I substituted my extra fruit-flavored cookie dough.

You'll notice in the pictures that my cookies are not even remotely pretzel shaped. I elected to make this a kid project at our cookie-decorating party, so I let the dough get very soft. Part of the problem was timing: The dough sat around outside the fridge waiting for us to be ready for it too long. Still, part of the problem was that I feared the kids wouldn't be able to roll snakes with cold dough, and so I took the dough out earlier than I would have for myself.

The kids did easily roll the dough into snakes, but the snakes fell apart when we tried to bend them into shapes. I settled on making looped ribbon shapes with the remaining dough.

I also neglected to make the egg white glaze. I don't know if this negatively affected the luster of the finished product, but it didn't seem to affect the ability of the sparkling sugar to stick where it managed to hit the dough.

Happy Holidays, everyone!

My comments in [brackets].

pretzel-cookies.jpgPretzel Cookies
Source: The King Arthur Flour Cookie Companion
Yield: 3 dozen pretzels

1 recipe Vanilla Cookie Dough or Chocolate Cookie Dough [or Fruit-Flavored Cookie Dough], chilled
Egg White Glaze
Coarse sugar or pearl sugar [You can find Swedish pearl sugar at Ikea, at least around Christmas.]

1. Preheat the oven to 350 degrees Fahrenheit. Lightly grease (or line with parchment) two baking sheets.

2. Break off a piece of dough the size of a table tennis ball. On a very lightly floured work surface, shape it into a rope about 10 inches long. Form the rope into a pretzel and place it on the prepared baking sheet. Repeat with the remaining dough. Brush each pretzel with the egg white glaze and sprinkle with coarse or pearl sugar.

3. Bake the cookies for 12 minutes, until they feel firm. Remove them from the oven and transfer to a rack to cool.

Egg White Glaze

1 large egg white
1 tablespoon water

Whisk together the egg white and water until slightly foamy. Refrigerate until ready to use.

Cookie Calendar: Forest Fruit Rugelach

rugelach01.jpg

Yes, I did feature this particular rugelach recipe last year, but I thought rather than feature a recipe I haven't yet made that instead I would tell you how I altered this recipe to fit my taste and ingredients on hand.

The original recipe calls for walnuts and raspberry jam. That's fine and tasty, but why rest on my laurels? I honor traditions, but tweaks keep things interesting.

I substituted chopped pecans for the walnuts. We had half a bag leftover from salad making, true, but pecans are the superior nut. Less bitter, and these days, it seems, less expensive.

rugelach02.jpg

(Three-year-old A did a great job spreading the jam here, but I did forget to tell him to leave a small circle of dough empty in the middle. You'll remember.)

For the raspberry jam, I skipped both the suggested apricot jam and the cherry filling in King Arthur Flour's version in favor of forest fruit jam. I spied a jar at the local Aldi, and it brought me back to last Christmas in Europe. Forest fruit is a standard jam flavor in East-Central Europe, as common as strawberry here. This one featured raspberries and blackberries among other tasty woodland berries.

I've found that rugelach adapt well to any jam or nut you feel inspired to use. You can also sprinkle in dried fruit. Be creative!

I'd suggest using salted butter instead of the unsalted I used to get extra flavor into your cookies. I read a post on shortbread over at the Bakers' Banter blog that suggested as such after I'd already made my dough. Oh well.

rugelach01.jpgForest Fruit Rugelach
Source: Adapted from Kraft Foods
Yield: 64 cookies

8 oz cream cheese, softened
1 cup (2 sticks) butter, preferably salted, softened
2¼ cups flour
1 cup finely chopped pecans
½ cup plus 2 tbsp. sugar, divided
1 tbsp. ground cinnamon, divided
¼ cup forest fruit preserves

1. Beat cream cheese and butter in large bowl with electric mixer on medium speed until well blended. Gradually add flour, mixing well after each addition. (Dough will be very soft and sticky.) Divide dough into 4 portions; place each on sheet of plastic wrap. Pat each portion into 1-inch-thick circle, using floured hands. Wrap plastic wrap around each circle to enclose. Refrigerate overnight.

2. Preheat oven to 325°F. Cover baking sheets with foil or parchment paper. Mix walnuts, 1/2 cup of the sugar and 2 tsp. of the cinnamon; set aside. Roll each portion of dough to 11-inch circle on lightly floured surface, lifting dough occasionally to add more flour to work surface as necessary. Spread each circle evenly with 1 Tbsp. of the preserves.

3. Sprinkle nut mixture over preserves. Cut each circle into 16 wedges. Roll up each wedge, starting from wide side. Place, point sides down, on prepared baking sheets; shape into crescents. Sprinkle with combined remaining 1 tsp. cinnamon and 2 Tbsp. sugar.

4. Bake 25 minutes or until lightly browned. Immediately remove from baking sheets. Cool on wire rack.

12 Days of Cookies: Stained Glass Wreath Cookies Recipe for MacGourmet

12daysofcookies.jpgIt took 12 days, but we finally got Sandra Lee's spin on store-bought cookie dough.

Unbelievably, this is the second recipe to call for store-bought cookie dough this year. Third, if you count Paula's snowflakes, which the e-mail said could be made with dough from a tube.

Food Network, what happened? Shouldn't cookie recipes include a cookie recipe?

While I'm willing to tolerate the heavy use of convenience products on the net's shows (though I can't help but roll my eyes every time the hosts insist that using a teaspoon from a spice packet or a squirt from a tomato-paste tube will "save money!" - that's bull), isn't the holiday season the one time of year to devote the time to baking from scratch? That's why busy people invented cookie swaps.

I just don't think I need instructions on how to place and bake Pillsbury sugar cookies.

And don't write to tell me your sob story about how you don't know how to bake. If you learned to read, you can bake. Heck, my three-year-old cousin can make cookie dough if you read him the recipe. Judging when the cookies are done baking is the hardest part, and Nestlé can't help you there.

Is this truly the last day for the 12 Days of Cookies? I won't post a round-up for this year until tomorrow passes with no bonus recipe. I hope a recipe does arrive tomorrow, as it's such a down note to end on a "recipe" that's really nothing more than decorating instructions.

Check out today's recipe on Food Network's site, or download Stained Glass Wreath Cookies into MacGourmet.

Cookie Calendar: Fruit-Flavored Cookie Dough

fruit-flavored01.jpgRemember the Pinwheel Cookies? Here's another dough to swirl into those fancy rounds, one that will light up kids' eyes with its psychedelic color.

The secret ingredient that transforms this dough from plain vanilla to a vivid hue is one 3-oz. box of flavored gelatin. You can use whatever flavor makes you happy, but I'm employing strawberry and lime for their Christmas-y colors.

My dough is chilling in the fridge, waiting for kids to come roll it into pretzels (I'll post that recipe soon), but tasted raw, the fruit flavor is as faint as the recipe warns. However, it does have the distinct sour tang of fruity gelatin. We'll see if it lasts when baked.

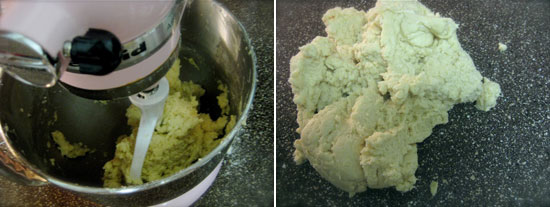
I made this and one other dough tonight. Wrapped in wax paper and sealed in gallon-sized zipper bags, they'll wait for me to have the time to roll them out. I often stockpile doughs in the fridge when doing my holiday baking, as it's much more efficient to keep reusing the ingredients and tools I have out without stopping to bake.

If you can't wait to bake this dough, visit the Pittsburgh Tribune-Review's web site, which has an excerpt from The King Arthur Flour Cookie Companion giving you recipes for the two other dough flavors plus instructions for the many cookie varieties you can craft from them.

P.S.: Yesterday's sugar cookie entry is now updated, with my baking experiences and beautiful photos. Check it out. Now.

Fruit-Flavored Cookie Dough
Source: The King Arthur Flour Cookie Companion
Yield: Depends on the baking method

3 tablespoons (3/4 ounce) confectioners' sugar
1 (4-serving size) package fruit-flavored dry gelatin mix
3/4 cup (1 1/2 sticks, 6 ounces) unsalted butter
1/2 teaspoon salt, extra-fine preferred
1 1/2 teaspoons vanilla extract
1 1/2 cups (6 1/4 ounces) unbleached all-purpose flour

In a medium mixing bowl, cream the sugar, gelatin mix, butter, salt and vanilla. Add the flour, stirring to make a cohesive dough. Flatten the dough into a disc, wrap in plastic wrap and refrigerate until ready to use.

12 Days of Cookies: Candy Cane Cookies Recipe for MacGourmet

12daysofcookies.jpgSpeak of the devil, and he appears.

In this case, blog about candy cane cookies, and another candy cane cookie recipes appears in your inbox the next morning.

Well, I'll be da - OK, maybe I'm taking the analogy too far.

Anyway, these cookies aren't quite the same as the recipe I baked yesterday. The Neelys' cookies are lemon flavored, rather than vanilla mint. They also twist two separate strips of dough together to create the striped candy-cane look instead of creating a variegated rectangle.

By now, I think it's clear that rather than going with a theme, like last year's international cookies, this year's newsletter is all about promoting the new crop of TV chefs. Half of the recipes so far have come from the rising stars at the network instead of our old favorites. We've come a long way since the days when most of the recipes came courtesy of the net's only dedicated pastry chef.

Check out today's recipe on Food Network's site, or download Candy Cane Cookies into MacGourmet.

Cookie Calendar: Peppermint Candy Canes

candy-canes01.jpg

I'm well settled in here at home for the holidays, so today my small cousins and I plunged into baking the first cookies of the Christmas season.

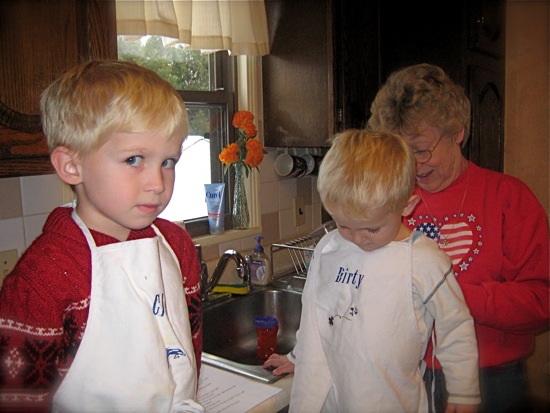
Cousin A, the youngest in the family, declared mint to be his favorite flavor, so we kicked off with Peppermint Candy Canes. I had set this recipe, along with a few other hands-on, cutesy choices, aside specifically for cousin-baking projects, so it all worked out well.

candy-canes04.jpg

I enjoy baking with kids of all ages. You get to discover where each kid's strengths lay, and you can watch them learn rapidly. For example, B, A's older brother, dove right into making the "snakes" we used to make the candy-cane stripes but had difficulty rolling a long, even cylinder. But with the help of a little flour and practice, he produced snakes as well as me by the end.

candy-canes02.jpg

When you bake with kids, certainly consider their ages when deciding how much to let them help, but don't underestimate them. No, don't give them a bunch of carrots and a sharp knife and then leave the room, but yes, let them measure, stir, and crack eggs. Show them how it's done; guide their hands the first time if needed. Kids learn quickly.

If you have slightly older kids working with you, don't forget to include some math, too: "If we need two tablespoons, and there's three teaspoons in a tablespoon, how many teaspoons do we need?" Some kids grasp multiplication intuitively this way.

And the cookies? Yummy - crisp outside, with a creamy mint flavor. But beware: They're delicate, especially along the seams. Be very careful prying them up and don't drop them!

candy-canes01.jpgPeppermint Candy Canes
Source: adapted from The King Arthur Flour Baker's Companion
Yield: about 36 candy cane cookies

5⅓ tablespoons (2⁵⁄₈ ounces) butter
⅓ cup (2⁵⁄₈ ounces) vegetable shortening
¾ cup (5¼ ounces) sugar
1 teaspoon baking powder
¼ teaspoon salt
1 large egg
1 tablespoon milk
½ vanilla extract
½ teaspoon peppermint extract
2 cups (8½ ounces) flour
1 to 2 teaspoons red food coloring
Sparkling sugar

1. Beat butter and shortening about 30 seconds with an electric mixer.

2. Beat in sugar, baking powder, and salt. Scrape the bowl occasionally.

3. Beat in egg, milk, and extracts.

4. Beat in as much flour as you can with the mixer. Mix in the rest with a wooden spoon.

5. Color ¼ of the dough red. Divide the rest of the dough in half. Color half pink. Chill the dough 30 to 60 minutes.

6. Preheat the oven to 375 degrees Fahrenheit.

7. Divide each dough portion into six pieces. Roll each piece into a 12-inch rope. Lay the ropes side by side on a lightly floured surface, alternating colors. Roll the ropes with a rolling pin into a single 14 x 9-inch rectangle about ¼ inch thick.

8. Use a pizza wheel to cut the rectangle diagonally into ½-inch-wide strips. Cut the strips into pieces 5 to 7 inches long. [I sliced once across the whole rectangle with the pizza cutter.] Press the shorter pieces together if necessary. Place on an ungreased cookie sheet. Curve one end of each piece to form a candy cane, then sprinkle each candy cane with sugar.

9. Bake for 7 to 8 minutes, until the edges are firm and bottoms are very lightly browned. Transfer to racks to cool.

Cookie Calendar: Cherry-Nut Rugelach

cookiecalendar.jpgRugelach arrived in this country from Eastern Europe, much like I did a few months ago.

OK, they might have spent more time there than I did.

Regardless, their Eastern European roots help explain why this cookie variety is so often associated with Jewish holidays, including Hanukkah. Eastern Europe at one time boasted a vibrant Jewish community, from Germany and the Czech Republic through Poland to Russia (and more, of course).

My family isn't Jewish, but enjoying cookies like rugelach doesn't require knowing the difference between Yom Kippur and Rosh Hashanah. Though we celebrate Christmas in December rather than Hanukkah, I make rugelach every year I have an oven.

I usually make the simpler Kraft recipe for rugelach since it goes over better with my family, but this cinnamon-y dried cherry filling is my personal preference. I made them in Las Vegas before heading home one year and shared them with my co-workers. Deeeeeelicious.

Rugelach dough tastes like a flaky pie crust, and but the filling is on the scant side since you don't create a pocket to hold it. Make sure you bake them on parchment, as otherwise you'll have a hard time scraping up the sticky filling bubbling out the edges.

Cherry-Nut Rugelach
Source: The King Arthur Flour Cookie Companion
Yield: 64 cookies

Dough
1 cup (2 sticks, 8 ounces) unsalted butter
One 8 ounce package cream cheese (reduced fat or full fat)
½ cup (3½ ounces) sugar
1¼ teaspoons salt
3 cups (12¾ ounces) unbleached all-purpose flour

Filling
1 cup (4⁵⁄₈ ounces) dried cherries
¾ cup (3 ounces) walnuts, toasted
1 cup (7 ounces) sugar
¼ cup (2 ounces) unsalted butter, melted
2½ teaspoons cinnamon
¼ teaspoon salt

Topping
1 large egg beaten with 2 teaspoons water
Granulated, coarse, or pearl sugar

1. To make the dough: In a large bowl, beat the butter and cream cheese until light. Add the sugar and salt and beat until fluffy. Stir in the flour, the gather the dough into a ball and knead it until it's smooth and all the flour is incorporated.

2. Divide the dough into 8 equal pieces, roll each into a ball, then flatten each slightly into thick disks. Wrap each in plastic wrap and refrigerate for 1 hour or longer.

3. Preheat the oven to 350 degrees F. Lightly grease (or line with parchment) two baking sheets.

4. To make the filling: Combine the filling ingredients in a food processor and pulse a few times (or finely dice the cherries and walnuts, add the remaining filling ingredients, and blend well).

5. To shape the cookies: Work with one dough disk at a time, and keep the others refrigerated. On a piece of parchment or a lightly floured work surface, roll the dough into an 8-inch circle. Place a small round lid (from a film canister, a salad dressing bottle, or something similar-sized) in the center of the circle. Spread ¼ cup of the filling over the dough, leaving ½ inch uncovered around the outside edge of the circle.

6. Remove the lid and use a sharp knife or pizza wheel to cut the circle into 8 equal wedges. Starting at the wide (outside) edge of each wedge, roll it toward its narrow edge, as you would a crescent roll. Place the rolled wedges, tip down, on the prepared baking sheets. Curve each cookie into a crescent shape. Repeat this process with the remaining dough.

7. Brush each cookie with some of the beaten egg mixture and sprinkle with sugar. Bake the rugelach for 20 minutes, or until they're golden brown. Remove them from the oven and transfer to a rack to cool.

Cookie Calendar: Holiday Bonbons

cookiecalendar.jpgMarzipan.

Frankly, that's enough to sell me on any cookie. I have a deep and abiding love for this sweetened paste made from bitter almonds, rivaled only by my love for buttery toffee.

As soon as I stumbled upon the recipe for Holiday Bonbons in my King Arthur Flour Cookie Companion, I knew they were on my list for the upcoming Christmas baking season. No doubt an eerie glow of greed haunted my eyes from the moment I picked up the marzipan log in the store until I baked the cookies themselves.

Alas, not every recipe can live up to such lofty expectations. While Holiday Bonbons are a tasty cookie (and one that my husband gobbled up speedily), they're not quite as overpoweringly delicious as biting straight into the leftover marzipan.

But they're sure a great excuse to have some leftover marzipan.

My cookies turned out a little too large the last time I made them. Unfortunately, the recipe offers only visual sizing guidelines, no specific weight or volume measurements. However, it does specify that you should end up with precisely 27 cookies. If I make these again this year, I will use my bench knife to divvy up the dough before rolling it, much like I did with yesterday's Jam Thumbprints.

Need a little help with that technique?

Ideally, you would use a scale, set to measure in grams, to ensure accurate division, but if you feel confident eyeballing your dough, then dive right in.

  • Form the dough into an even log and divide it into thirds (3 pieces).
  • Even out each pieces, then divide each third into thirds (9 pieces).
  • Repeat the previous step to end up with 27 pieces of cookie dough.


Use the same procedure on your filling to ensure you have enough to go around.

Holiday Bonbons
Source: The King Arthur Flour Cookie Companion
Yield: 27 cookies

Dough
1 cup (2 sticks, 8 ounces) unsalted butter
1½ cups (6 ounces) confectioner's sugar
1 tablespoon vanilla extract
¾ teaspoon salt
2½ cups (10½ ounces) unbleached all-purpose flour

Filling
½ cup (4½ ounces) almond paste, praline paste, or marzipan
1 tablespoon unsalted butter
¹⁄₈ teaspoon almond oil, or ½ teaspoon almond extract (omit if you use praline paste)
¼ cup (1 ounce) confectioners' sugar (omit if you use marzipan)
½ cup (1¹⁄₈ ounce) soft, fresh bread crumbs

Glaze
1¼ cups (7½ ounces) chocolate chips
2 tablespoons (1 ounce) unsalted butter
2 tablespoons (1³⁄₈ ounce) light corn syrup
Sliced almonds for topping, optional

1. Preheat the oven to 350 degrees F.

2. To make the dough: In a medium-sized mixing bowl, beat the butter until light. Add the sugar, vanilla, and salt and beat until fluffy. Add the flour and stir until a firm dough forms.

3. To make the filling: Crumble the almond paste into a small bowl. Beat in the butter, almond oil, and sugar. When the mixture is smooth, add the bread crumbs and mix until blended.

4. To shape the cookies: Roll the filling into grape-sized balls. Break off a piece of dough the size of a table-tennis ball and use your thumb to make a deep indentation in the center. Place a ball of filling in the indentation, then bring the dough up and over to enclose it, rolling it in your hands to make a smooth ball. Repeat with the remaining filling and dough.

5. Place the bonbons on two ungreased (or parchment-lined) baking sheets and bake them for 14 minutes. They won't brown, which is OK. Let the bonbons cool on the baking sheet for 10 minutes (they're fragile when hot) before transferring to a rack to cool completely.

6. To make the glaze: Melt the chocolate chips in a microwave or double boiler. Add the butter and corn syrup, stirring until smooth and glossy.

7. Dip the tops of the cooled bonbons in the glaze. If the glaze thickens, reheat it briefly, then continue dipping. Top each with an almond slice or two, if desired. Let the bonbons sit for several hours until the glaze hardens, then store them in an airtight container.

Cookie Calendar: Jam Thumbprints

jam-thumbprints08.jpg

Jam Thumbprints are one of my holiday standbys, but I could never settle for only one recipe. To declare one variation best of all would be to give up all hope of improvement. And if not to strive to better ourselves and our world, what is our raison d'ĂȘtre?

The last recipe for jam thumbprints I made was this one from the 12 Days of Cookies newsletter. I remember them tasting heavenly, buttery and delicious, but also being crumbly, a bear to store, and tricky to form.

On top of that, my cookies turned out huge. You never want huge cookies for the holidays because it leads people to only sample one. Then you feel like you worked your bottom off producing a cornucopia of delights for nothing.

For once, I feel like an America's Test Kitchen recipe actually solved real problems for me. Much of the time, I find their recipes needlessly fussy, especially for baking . . . though I own a ton of their cookbooks anyway. Nonetheless! This recipe creates a clear-cut procedure for turning out bite-sized butter cookies with perfectly centered, non-drippy jam centers.

jam-thumbprints10.jpg

Caveats? The dough cracks a lot. Maybe if you worked more quickly than I you would make the second depressions more smoothly. I don't mind the cracks much myself.

Second, the cookie part isn't as rich as other jam thumbprints I've tried. It's a bit drier, more floury tasting. Maybe it's the long baking time.

jam-thumbprints07.jpg

Still, people will not be left unsatisfied with these little jewels. For best results, follow the authors' recommendation and don't use jams with seeds. The crunch in my boysenberry specimens is distracting. Also, apple butter may be tasty, but it sure looks ugly as a filling.

The rest of my cookies runneth over with one of my perpetual favorite fillings, lingonberry jam. Mmm.

jam-thumbprints09.jpg

Because I still do not own a small, "teaspoon" sized cookie scoop, I could not make these the easy way. I opted to skip the inexact two-spoons method in favor of a technique borrowed from roll-making. I used my bench knife and scale to cut the dough into 48 nearly equal pieces.

jam-thumbprints11.jpg

It's not as exhausting as it sounds. Roll-out cookies are way worse. I swear.

I edited the recipe slightly for clarity. My additions are in [brackets].

jam-thumbprints08.jpgJam Thumbprints
Source: The America's Test Kitchen Family Baking Book
Yield: about 4 dozen cookies

½ cup seedless raspberry jam
2¼ cups (11¼ ounces) all-purpose flour
½ teaspoon salt
½ teaspoon baking soda
¼ teaspoon baking powder
12 tablespoons (1½ sticks) unsalted butter, softened
⅔ cup (4⅔ ounces) sugar
3 ounces (6 tablespoons) cream cheese, softened
1 large egg
1½ teaspoons vanilla extract

1. Heat the oven to 350 degrees. Line 2 large baking sheets with parchment paper. Fill a small zipper-lock bag with the jam. Whisk the flour, salt, baking soda, and baking powder together in a medium bowl.

2. In a large bowl, beat the butter and sugar together with an electric mixer on medium speed until light and fluffy, 3 to 6 minutes. Beat in the cream cheese, egg, and vanilla until combined, about 30 seconds, scraping down the bowl and beaters as needed.

3. Reduce the mixer speed to low and slowly add the flour mixture until combined, about 30 seconds.

4. Working with 1½ teaspoons of dough at a time, roll the dough into balls and lay them on the prepared baking sheets, spaced about 1½ inches apart [four across on a standard half-sheet pan]. Make an indentation in the center of each cookie with your thumb.

5. Bake the cookies, on sheet at a time, until they are just beginning to set and are lightly browned around the edges, about 10 minutes. Remove the cookies from the oven and, working quickly, gently reshape the indentation with the bottom of a teaspoon measure. Snip a small corner off the bag of jam and carefully fill each indentation with about ½ teaspoon of the jam. Rotate the baking sheet and continue to bake until lightly golden, 12 to 14 minutes.

6. Let the cookies cool on the baking sheets for 10 minutes, then transfer to a wire rack and let cool completely, about 30 minutes, before serving.

Cookie Calendar: Maamoul

I made these particular cookies last year. It was the first (well, and only) time I've ever worked with dates. I'm a big fan of those bacon-wrapped dates and Middle Eastern-style desserts, so I had to try these.

Don't expect the cookie dough part to shine. The outside looks like a soft biscuit, and the taste is none too sweet with so little sugar. But then, the dough part is just the vehicle for delivering that sweet, fruity filling to your mouth, and you don't want the outside bit to steal the show.

It's kind of like a Fig Newton but so much prettier.

Use the high-quality Medjool dates for best results. If you don't see crystallized ginger sitting around where they keep the fruitcake ingredients, check the spice aisle. McCormick sells bottles of it with their fancy line of spices, and one of their jars equals a 1/4 cup.
And if you have the money for it, buy two jars of that stuff. Crystallized ginger is seriously delicious.

Cookie Tip #17: Check with your guests before the big day to see if there are any dietary needs you will need to account for in your baking. For example, you might need to whip up some nut-free choices (plan on a separate platter for those so there isn't cross-contamination that could trigger allergies) or something gluten-free such as coconut macaroons. As for all those butter- and egg-hating vegans, well, there's always dark chocolate bark.

Maamoul
Source: Food Network
Yield: 20 cookies
Filling:

  • ½ lb. pitted soft Medjool dates

  • 2 tablespoons water

  • Pinch fine salt

  • ¼ cup finely chopped crystallized ginger

  • ½ teaspoon finely grated orange zest


Dough:

  • 2 cups all-purpose flour

  • 1 teaspoon baking powder

  • 1 tablespoon confectioners' sugar, plus about 1/2 to 2 cups more for dusting

  • Pinch fine salt

  • ½ cup unsalted butter (1 stick), plus 2 tablespoons

  • 2 tablespoons neutral flavored oil, such as canola

  • ¼ cup milk


Preheat the oven to 325 degrees F.

To make the filling: Puree the filling ingredients in a food processor until evenly combined, about 1 to 2 minutes. Remove and set aside. Clean the processor bowl.

Put the flour, baking powder, the 1 tablespoon confectioners' sugar, and salt in the bowl of food processor and pulse 3 to 4 times to mix. Add the butter, oil, and milk pulsing until the dough just comes together. Take care not to overwork the dough; it will be slightly wet.

Remove dough from the processor, and roll into 20 equally sized balls. In the palm of your hand, press and pat each ball of dough into a 2 3/4-inch round. Place a rounded teaspoon of filling in the center of each round and draw the edges up and around the filling. Pinch the dough together to make a sealed ball, and then carefully roll the cookie between your palms to make a smooth round ball. Press gently to flatten the cookie slightly, then place them seamed side down on a parchment-lined baking sheet. Repeat with the remaining dough and filling. Gently prick the cookies with a fork or a wooden skewer in a decorative pattern taking care not to pierce the dough to the filling.

Bake the cookies until firm and slightly puffed, and the tops are pale but the bottoms are just beginning to turn slightly golden, about 25 to 30 minutes. Dust generously with confectioners' sugar, cool and dust again.

Other fillings we love:

Apricot Golden Raisin Nut Filling:
1/3 cup hazelnuts, toasted and chopped (other nuts can be substituted)
1/3 cup golden raisins
3 tablespoons apricot jam
Pinch fine salt

Puree in a food processor until evenly combined.

Quince-Walnut Filling:
1/2 cup walnuts, toasted
1/3 cup quince jam
Pinch fine salt

Puree in a food processor until evenly combined.

Download Maamoul into MacGourmet.

Cookie Calendar: Butter and Jam Thumbprints

I came across this recipe in my investigation of Food Network's 12 Days of Cookies newsletter, which I'll be discussing in a few future entries here. I made these particular cookies last Christmas (2006) for the cookie swap at the school where I taught third grade.

I realize, these are perhaps not the best cookie for a cookie exchange, as you really can't stack them willy-nilly in a take-home container. In fact, I placed them in a single layer in a special box just to get them to school in the first place, which should have told me something.

Still, I couldn't resist showing off with this beautiful, beautiful cookie. It made fewer than I expected (I think I might have ended up bringing a second batch of something else to make up for the shortfall), considering that some came out "too messy" to give away to anyone but my and Scott's mouths.

I used strawberry jam for some of my batch and my favorite Ikea lingonberry jam for the rest (lingonberry tastes a lot like cranberry to me, and what better flavor for the holidays?). Both produced a lovely ruby-red jewel tone in the center of each cookie, with a berry flavor that complemented the sandy, buttery baked dough.

You should probably make these no more than three days before you plan to serve them so you can store them in a single layer at room temperature. They're magnets for crumbs with that jam center, so you must be careful. With all the jostling in the freezer, I found that a similar recipe for thumbprints I made a few years before just weren't good sub-zero survivors.

Cookie Tip #14: Cookies made with butter are especially prone to spreading, which is why many recipes recommend chilling your dough after mixing and whenever you're not specifically using it. Another way to minimize spreading is to make sure your cookie sheets are no warmer than room temperature when you put your raw dough on them. Achieving this can be tough when you're constantly swapping sheets during the holidays, so here's the trick: Clear some space in your freezer (you're never going to eat those leftovers anyway!) and stick each emptied tray in there for just a minute or two before placing on fresh dough. The freezer will suck the heat out of an aluminum tray lickety split!

Butter and Jam Thumbprints
Source: Food Network
Yield: 24 to 30 cookies

  • 1 ¾ cups all-purpose flour

  • ½ teaspoon baking powder

  • ½ teaspoon fine salt

  • ¾ cup unsalted butter (1 1/2 sticks), softened

  • ⅔ cup sugar, plus more for rolling

  • 1 large egg

  • ½ vanilla bean, seeds scraped from pod, or 1/8 teaspoon vanilla bean paste or 1 teaspoon pure vanilla extract

  • ⅓ cup raspberry, cherry or strawberry jam


Preheat oven to 350 degrees F. Line 2 baking sheets with parchment paper or silicone mats.

Whisk the flour, baking powder and salt together in a bowl.

In another bowl, whip the butter and the sugar with a hand-held mixer until fluffy, about 5 minutes. Beat in the egg and vanilla until just combined. Slowly beat in the dry ingredients in 2 additions, mixing just until incorporated.

Scoop the dough into 1-inch balls with a cookie or ice cream scoop and roll in sugar. Place about 2-inches apart on the prepared baking sheets. Press a thumbprint into the center of each ball, about 1/2-inch deep. Fill each indentation with about 3/4 teaspoon jam.

Bake cookies until the edges are golden, about 15 minutes. (For even color, rotate the pans from top to bottom about halfway through baking.) Cool cookies on the baking sheets. Serve.

Store cookies in a tightly sealed container for up to 5 days.

Download Butter and Jam Thumbprints into MacGourmet.

Cookie Calendar: Rugelach

I'm kind of late to the party on Hanukkah, but I kept debating whether to save these cookies for the end of the Cookie Calendar because they are just. So. Good.

I concluded that not only must I allow you time to make and enjoy these properly this month, but that since this is a cookie that is sometimes associated with Hanukkah you should get the recipe now, during the Festival of Lights.

Though if you could consider a latke a cookie in that it is small and round, I do think I would anoint that my favorite Hannukah cookie.

Anyway, rugelach are truly delicious. They're a cross of a cookie, a pastry, and a teeny-tiny pie. You roll out the dough in a circle like pie crust, then paint on some jam and sprinkle on some sugar, spices, and nuts.

But then you cut it like a pizza and roll it like a crescent roll, which kind of goes against my dessert analogies. Whatever. The result is a ton of delicious cookies that are a big favorite of the family every year.

My family prefers this version, made with raspberry jam, but a little searching will lead you to a variety of other fillings based on dried fruits. Personally, I love the kind made with dried cherries in my King Arthur Cookie Companion. You can also use this particular recipe with different flavors of jam -- whatever's in your fridge.

Cookie Tip #10: Though some recipes may say margarine is an option, DON'T DO IT! Always make your cookies with butter, not margarine, for the best flavor and predictable results. Also, unless otherwise specified, you should use fresh, unsalted butter. Most recipes include added salt, and you don't want the cookies to end up too salty, true. But mostly, salt is added to butter as a preservative, meaning your salted butter is probably old butter.

Rugelach
Source: Kraft Foods

  • 1 pkg. (8 oz.) PHILADELPHIA Cream Cheese, softened

  • 1 cup (2 sticks) butter or margarine, softened

  • 2-¼ cups flour

  • 1 cup finely chopped PLANTERS Walnuts

  • ½ cup plus 2 Tbsp. sugar, divided

  • 1 Tbsp. ground cinnamon, divided

  • ¼ cup raspberry preserves


BEAT cream cheese and butter in large bowl with electric mixer on medium speed until well blended. Gradually add flour, mixing well after each addition. (Dough will be very soft and sticky.) Divide dough into 4 portions; place each on sheet of plastic wrap. Pat each portion into 1-inch-thick circle, using floured hands. Wrap plastic wrap around each circle to enclose. Refrigerate overnight.

PREHEAT oven to 325°F. Cover baking sheets with foil or parchment paper. Mix walnuts, 1/2 cup of the sugar and 2 tsp. of the cinnamon; set aside. Roll each portion of dough to 11-inch circle on lightly floured surface, lifting dough occasionally to add more flour to work surface as necessary. Spread each circle evenly with 1 Tbsp. of the preserves.

SPRINKLE nut mixture over preserves. Cut each circle into 16 wedges. Roll up each wedge, starting from wide side. Place, point sides down, on prepared baking sheets; shape into crescents. Sprinkle with combined remaining 1 tsp. cinnamon and 2 Tbsp. sugar.

BAKE 25 minutes or until lightly browned. Immediately remove from baking sheets. Cool on wire rack.

Notes:
Size It Up

Sweets can add enjoyment to a balanced diet, but remember to keep tabs on portions.

Great Substitute

Substitute PLANTERS Pecans for the walnuts and/or apricot preserves for the raspberry preserves.

Nutritional notes:
For two cookies:
Calories 150
Total fat 11g
Saturated fat 4.5g
Cholesterol 25mg
Sodium 70mg
Carbohydrate 13g
Dietary fiber 1g
Sugars 6g
Protein 2g
Vitamin A 6%DV
Vitamin C 0%DV
Calcium 0%DV
Iron 4%DV

Download Rugelach into MacGourmet.

Cookie Calendar: Eggnog Thumbprints

Here is a cookie recipe posted in tribute to my dear eggnog-lover, Scott. Though I'm still trying to get used to the stuff, Scott loves that traditional holiday beverage that, as it happens, we watched Alton Brown make via our TiVo this evening.

These cookies obviously lack that thick, coating mouth feel of eggnog the beverage, and their booziness is slightly reduced as well. Still, the spices and other flavors come through, especially that signature nutmeg.

If I remember correctly, I made these as sandwich cookies rather than thumbprints, possibly because that would have made them easier to store in the freezer. As I bake for weeks before Christmas, I always freeze most of each batch to keep them fresh for the big day. Still, I think the flavor of the icing would come through a lot better if you followed the recipe's recommendation simply to fill the cookie cavity.

Cookie Tip #6: To freeze cookies with decorated or frosted tops, first spread them in one layer on a frosty cookie sheet and place the sheet in your freezer. The aluminum of the tray should suck the warmth from the cookies more efficiently, plus this method lets the soft topping turn solid before you stack the treats in freezer bags or plastic containers.

Eggnog Thumbprints
Source: Better Homes and Gardens
Yield: 40 cookies

  • ⅔ cup butter, softened

  • ½ cup granulated sugar

  • ⅛ teaspoon ground nutmeg

  • 2 egg yolks

  • 1 teaspoon vanilla

  • 1-½ cups all-purpose flour

  • 2 slightly beaten egg whites

  • 1 cup finely chopped walnuts

  • ¼ cup butter

  • 1 cup sifted powdered sugar

  • 1 teaspoon rum or 1/4 teaspoon rum extract

  • 1 to 2 teaspoons milk

  • Ground nutmeg


1. Beat the 2/3 cup butter in a mixing bowl with an electric mixer on medium to high speed for 30 seconds. Add granulated sugar and the 1/8 teaspoon nutmeg; beat until combined. Beat in egg yolks and vanilla. Beat in as much flour as you can. Stir in any remaining flour with a wooden spoon. If necessary, cover and chill dough about 1 hour or until easy to handle.

2. Shape into 1-inch balls. Roll balls in egg whites, then in chopped walnuts. Place 1 inch apart on lightly greased cookie sheets. Press centers with your thumb. Bake in a 375 degrees F oven for 10 to 12 minutes or until edges are lightly browned. Cool on wire racks.

3. For filling, beat the 1/4 cup butter until softened. Add powdered sugar and beat until fluffy. Beat in rum or rum extract and enough milk to make of spreading consistency. Spoon or pipe about 1/2 teaspoon filling into center of each cookie. Sprinkle with nutmeg.

Notes:
Make-Ahead Tip: Bake and cool cookies but do not fill. In an airtight or freezer container arrange cookies in a single layer; cover with a sheet of waxed paper. Repeat layers, leaving enough air space to close container easily. Freeze up to 1 month. To serve, thaw cookies. Prepare filling and spoon or pipe into center of each cookie. Sprinkle with nutmeg.

Nutritional notes:
calories: 96, total fat: 6g, saturated fat: 3g, cholesterol: 22mg, sodium: 46mg, carbohydrate: 9g, fiber: 0g, protein: 1g, vitamin A: 5%, vitamin C: 0%, calcium: 0%, iron: 2%

Download Eggnog Thumbprints into MacGourmet.

Cookie Calendar: Almond Snowball Cookies

We're back from our vacation, and Advent is just beginning -- it's time to start the Cookie Countdown to Christmas!

I'll kick off this year with one of my favorite holiday cookies. Like many of my favored cookie recipes, it is heavy on nuts. Nuts (but especially almonds, which I also enjoy as marzipan) add a great richness and special holiday flavor to cookies.

I apologize in advance to everyone with nut allergies, and I will try to feature nut-free cookies as well.

Almond Snowballs came to me via the Food Network's 12 Days of Cookies Newsletter. I believe it was the inaugural newsletter that featured this recipe, as a matter of fact. (By the way, Food Network -- why won't you send me the newsletter this year? What gives?)

That year was also the first time I seriously got into holiday cookie baking. Since then, I've made it a holiday tradition to whip up as many varieties as I can each year to serve as our Christmas dessert (as well as filling out the platters on any holiday get-togethers before and after).

These cookies are intended to be made in the food processor, which is a necessity if you plan to make your own almond meal. However, if you buy almond meal (ground-up almonds) at the store or if you do the grinding in a mini-chopper, it's perfectly fine to do the rest with your mixer.

Cookie Tip #1: Don't overbake! Cookies (including Almond Snowballs) dry out if they spend too much time in the oven. Generally, pull them as soon as they turn lightly golden around the edges, and then let them rest for about a minute on the trays to firm up before removing them to wire cooling racks.

Almond Snowballs
Source: Food Network
Yield: 30 cookies

  • ¾ cup sliced almonds

  • ¾ cup sugar

  • ¾ cup unsalted butter, sliced and softened (1 1/2 sticks)

  • ½ teaspoon pure vanilla extract

  • ⅛ teaspoon almond extract

  • 1 ⅔ cups all-purpose flour

  • ½ teaspoon fine salt

  • 1 cup confectioners' sugar


Pulse the almonds and sugar in a food processor until very finely ground. Add the butter and process until smooth, about 1 minute. Scrape the dough off the inside of the bowl, if needed. Add the vanilla and almond extracts and pulse to combine. Add the flour and salt and pulse to make a soft dough. Turn the dough out onto a large piece of waxed paper and roll into a log about 15 inches long and 1 1/2 inches wide. Wrap and refrigerate for 30 minutes. Preheat the oven to 325 degrees F. Line 2 baking sheets with parchment paper.

Cut the chilled dough into 1/2-inch pieces and roll by hand into balls. Space the cookies evenly on the prepared baking sheets and bake until slightly golden, rotating the sheets once, 15 to 20 minutes. Put the confectioners' sugar in a pie plate. Briefly cool the cookies on a rack, then gently toss in the confectioners' sugar until evenly coated. Return to rack, cool to room temperature, and then toss again in the confectioners' sugar.

Notes:

Almond extract and finely ground almonds create a distinct flavor while confectioners' sugar adds a festive element.

Download Almond Snowball Cookies into MacGourmet.