Showing posts with label King Arthur Flour. Show all posts

Cookie Calendar: Pretzel Cookies

pretzel-cookies.jpg

Here's another variation on plain old icebox cookie dough. The recipe calls for vanilla or chocolate dough - I assume because they look most pretzel-like - but I substituted my extra fruit-flavored cookie dough.

You'll notice in the pictures that my cookies are not even remotely pretzel shaped. I elected to make this a kid project at our cookie-decorating party, so I let the dough get very soft. Part of the problem was timing: The dough sat around outside the fridge waiting for us to be ready for it too long. Still, part of the problem was that I feared the kids wouldn't be able to roll snakes with cold dough, and so I took the dough out earlier than I would have for myself.

The kids did easily roll the dough into snakes, but the snakes fell apart when we tried to bend them into shapes. I settled on making looped ribbon shapes with the remaining dough.

I also neglected to make the egg white glaze. I don't know if this negatively affected the luster of the finished product, but it didn't seem to affect the ability of the sparkling sugar to stick where it managed to hit the dough.

Happy Holidays, everyone!

My comments in [brackets].

pretzel-cookies.jpgPretzel Cookies
Source: The King Arthur Flour Cookie Companion
Yield: 3 dozen pretzels

1 recipe Vanilla Cookie Dough or Chocolate Cookie Dough [or Fruit-Flavored Cookie Dough], chilled
Egg White Glaze
Coarse sugar or pearl sugar [You can find Swedish pearl sugar at Ikea, at least around Christmas.]

1. Preheat the oven to 350 degrees Fahrenheit. Lightly grease (or line with parchment) two baking sheets.

2. Break off a piece of dough the size of a table tennis ball. On a very lightly floured work surface, shape it into a rope about 10 inches long. Form the rope into a pretzel and place it on the prepared baking sheet. Repeat with the remaining dough. Brush each pretzel with the egg white glaze and sprinkle with coarse or pearl sugar.

3. Bake the cookies for 12 minutes, until they feel firm. Remove them from the oven and transfer to a rack to cool.

Egg White Glaze

1 large egg white
1 tablespoon water

Whisk together the egg white and water until slightly foamy. Refrigerate until ready to use.

Cookie Calendar: Marble Cookies

marble-cookies02.jpg

The next couple of recipes are variations on icebox cookie dough. We've already covered pinwheel cookies made with vanilla and chocolate doughs, and we also discussed whipping up fruit-flavored cookie dough. Now, we consider what else to do with all this dough!

Note that these recipes do use King Arthur Flour's recipes for vanilla and chocolate icebox dough. You can find the recipes for those doughs on the Pittsburgh Tribune-Review web site.

I whipped up these marble cookies using half the fruit-flavored dough I'd made (I saved the rest for tomorrow's pretzel cookies). I didn't set out to make marble cookies, but when I saw just how many hours checkerboard cookies entailed, marble cookies looked just so enticing.

marble-cookies01.jpg

Besides, marble cookies look a lot more like the "play-dough cookies" they sell at bakeries. Surprisingly, the dough does not get muddy looking from all the twisting and folding; each color remains distinct. The effect is elegant, much like the real deal, yet requires much less effort than either checkerboard or pinwheel cookies.

One warning: A lot of guests weren't too keen on the fruity doughs' flavor. I heard it compared to Trix cereal; I can't verify that as I've never tried Trix. There is a distinct Jello tang to the cookies. It might be less noticeable if you didn't mix two fruit-flavored doughs like I did.

It also might stand out less if you hadn't let your red dough sit in the fridge for more than I week like I did. Live and learn.

My comments in [brackets].

Marble Cookies
Source: The King Arthur Flour Cookie Companion
Yield: 4 dozen cookies

Prepare 2 recipes of cookie dough in different flavors -- vanilla and fruit, or vanilla and chocolate, for example. Place a piece of parchment or wax paper on a work surface. Lay 1 piece of dough on the parchment and roll it into a 12- by 9-inch rectangle. Set aside.

Using another piece of parchment or wax paper, roll the other piece of dough just slightly smaller than the first, into an 11 1/2- by 8 1/2-inch rectangle. Brush the Egg White Glaze [see below] over the larger piece of dough.

Tear the smaller piece of dough into irregular shapes and place them haphazardly onto the glazed dough. [The pieces can be stacked on top of each other.] Fold the dough in half crosswise, give it a quarter turn, then fold in half again. On the second fold, gently twist the dough as you fold, as though you were wringing out a cloth; this will increase the marbling effect. It will look messy, but that's OK.

Roll the dough into a log, smoothing the outside, wrap in plastic wrap or parchment and freeze until firm [about 30 minutes is fine].

Use a sharp knife to gently cut the log into 1/4-inch slices. If the dough becomes too soft to handle, place it back in the freezer briefly. Transfer the cookies to the prepared baking sheets.

Bake for 12 to 14 minutes, or until the cookies feel firm. Remove from the oven and transfer to a wire rack to cool.

Egg White Glaze

1 large egg white
1 tablespoon water

Whisk together the egg white and water until slightly foamy. Refrigerate until ready to use.

Cookie Calendar: Soft Gingerbread with Hard Glaze

soft-gingerbread01.jpg

Is it a cop out to post the same recipe twice in one year?

It's not exactly the same, however. I'm giving you a variation today on the crunchy gingerbread I made a few days ago. By changing the size and shape of the cookies, you can make a big, soft, slightly chewy cookie that will get just as many oohs and aahs but won't put you out the effort of making a second batch of molasses cookies.

Plus, I'm throwing in a recipe for an opaque Hard Glaze today. It's all good.

I spread each cookie with a generous dollop of said icing, which thickened considerably upon standing for, well, more than a day before I got around to using it. I then dipped each cookie in a bowl of mixed sprinkles and sparkling sugars I had rescued from the kids' last attempt at decorating gingerbread men.

soft-gingerbread02.jpg

For the Soft Gingerbread Cookies, follow the original recipe for Gingerbread Cookies, but chill the dough in the bowl. Then, use a medium-sized tablespoon cookie scoop (or heaping tablespoons) to portion the dough onto ungreased cookie sheets. Use the bottom of a drinking glass to flatten the balls to rounds about 1/2-inch thick. Bake for 8 minutes, until the cookies start turning slightly golden at the edges and look dry but are still soft. Let them rest on the sheets for a couple of minutes to firm up before removing to a cooling rack.

And now, for the icing on the cookie. I left out the vanilla, so my glaze might look slightly whiter. Still, when I make this for my sugar cookies, I think I'll include the vanilla for a touch of extra flavor.

soft-gingerbread01.jpgHard Glaze for Cookies
Source: The King Arthur Flour Cookie Companion
Yield: 1 1/4 cups glaze

1/4 cup (1 ounce) meringue powder [look for it by the baking supplies at the craft store]
1/4 teaspoon salt
3 to 4 cups (12 to 16 ounces) confectioners' sugar
1/3 to 1/2 cup (2 5/8 to 4 ounces) cool water
1 teaspoon vanilla extract
Food color or coloring paste

1. In a medium-sized mixing bowl, whisk together the meringue powder, salt, and confectioners' sugar. Add 1/3 cup cool water and the vanilla, and stir, or beat on slow speed. The mixture will seem hard and lumpy, but the sugar will dissolve after 4 or 5 minutes and everything will smooth out. Add more water, 1 tablespoon at a time, mixing well after each addition to achieve a spreadable consistency. For a very smooth, shiny glaze, the icing should be the consistency of corn syrup or molasses. For colored icing, add food color or coloring paste a drop at a time.

2. Dip the tops of cooled cookies in the glaze, then sweep a spatula over them to remove the excess. Place cookies on a rack for several hours for the glaze to harden and dry. This may take as long as overnight, depending on the humidity of your kitchen and the consistency of the glaze.

Date Lovers Unite!

. . . and bake some Date Pinwheels:

To us, dates are comforting, sweet, intense. A fresh Medjool date with a filling of cream cheese and some chopped nuts is one of the nicest things on earth. And at holiday time, it’s just not right unless a batch of Date Pinwheels (or two) gets made. They’re the perfect do-ahead cookie, because they need to be rolled and chilled before slicing. And they can certainly be made up and frozen, up to 2 months in advance.


By the way, if you're looking for a tasty hors d'oeuvre for your holiday parties, try stuffing a dried, pitted date with a whole almond, then wrapping the whole thing in 1/2 or 1/3 of a slice of bacon and baking until burnished. They're heavenly as is, but you can garnish them with crumbled blue cheese if you wish.

Cookie Calendar: Decorator's Dream Cookies

Picture soon!

I put all those tips I expounded upon yesterday (now with pictures!) into practice today. My cutout experience was, far and away, much, much easier this time around. It came even close to meriting the name of today's recipe: Decorator's Dream Cookies.

The dough was thoroughly chilled before I even started to roll, as I let it sit in the fridge for a couple days until I felt confident enough to make cutouts. It held up in storage perfectly.

The moment the dough seemed to soften, I stuck it in the freezer for a few minutes. I kept the dough on the chilled cookie sheets to retain the low temperature for as long as possible. The cold, hardened dough cut cleanly and peeled off the parchment without much trouble.

Which was definitely a good thing, as I cut huge cookies out of this dough (that I forgot to take a picture of before wrapping and freezing - you'll have to wait for Saturday at least!). Those trees and snowmen will get a hard, opaque glaze suitable for writing on with food-safe markers at the kids' Christmas party.

The third round of cutouts, though, I devoted to smaller cookies for us to snack on before Christmas. I have to say, despite being the third rollout, and despite all the extra flour from rolling, these cookies stayed tender. A sweet, delicious confection.

I'd recommend this sugar cookie recipe just as highly as Alton Brown's. His cookies, being plain, are best suited to strongly flavored icings. These cookies, with their hefty dose of extract (I used vanilla), don't need anything more than a glaze. They'd also be fine with bland royal icing.

After all, they are a decorator's dream.

Decorator's Dream Cookies
Source: The King Arthur Flour Cookie Companion
Yield: About 4 dozen 2-inch cookies

1 cup (2 sticks, 8 ounces) unsalted butter
2 cups (8 ounces) confectioners' sugar
2 tablespoons (1 1/4 ounces) light corn syrup
1/4 teaspoon Fiori di Sicilia, or 1 teaspoon vanilla extract or almond extract
1/2 teaspoon salt
1 large egg, lightly beaten with 2 tablespoons water
1 teaspoon baker's ammonia (optional) [for extra-crisp cookies]
3 1/2 cups (14 3/4 ounces) unbleached all-purpose flour

1. In a medium-sized bowl, cream together the butter, sugar, and corn syrup until light and fluffy. Beat in the Fiori or extract and salt. Add the baker's ammonia to the egg and water and stir to dissolve. Add this mixture, along with the flour, to the ingredients in the bowl and beat until smooth. Divide the dough in half, put each half in a plastic bag, and flatten each slightly. Refrigerate for 1 hour.

2. Preheat the oven to 350 degrees F. There's no need to grease the baking sheets.

3. Take one piece of dough out of the refrigerator and flour a clean work surface and the dough. Roll it out as thin or thick as you like; for slightly less crisp cookies, roll it out more thickly. We roll these cookies to a 1/16 to 1/8-inch thickness. Sprinkle flour under and on top of the dough to keep it from sticking to the table or rolling pin.

4. Alternatively, place the dough on parchment and put a sheet of plastic wrap over it as you roll, pulling the plastic to eliminate wrinkles as necessary when rolling. This will keep dough from sticking without the need for additional flour.

5. Cut out shapes with a cookie cutter, cutting them as close to one another as possible.

6. Transfer the cookies to the ungreased cookie sheets (or, if you've rolled right on parchment, remove the dough scraps between the cookies). Bake the cookies just until they're slightly brown around the edges, 8 to 12 minutes, or until they feel firm. Let the cookies cool on the baking sheets for several minutes, or until they're set. Transfer them to a rack to cool completely. Repeat with the remaining dough.

Cookie Calendar: Gingerbread Cookies

gingerbread01.jpg

I faced down my cookie demons tonight and attempted some honest-to-goodness cutout cookies. No slicing, no pressing - this time, I flattened the dough with a rolling pin and used actual cookie cutters.

It took an hour and a half. For half the cookies.

I did learn a few valuable rollout-cookie lessons.

1. Keep the dough very, very cold. Alton Brown instructed me it was essential on his show yesterday, and today I discovered how right he was. The process went a lot more smoothly when I stuck the dough in the freezer for about 10 minutes after I rolled it out. The cutters pushed through more crisply, and the dough held its shape as I peeled it off the parchment.

2. Roll on parchment. Being able to lift the parchment and peel it back from the cookies made it a lot easier to get them up for transferring to the cookie sheet. A spatula can smoosh the dough, making it lose its shape.

3. Flour generously. AB suggests confectioner's sugar, but I have more flour around. The flour works with the chilling to prevent sticking. It's especially helpful for rubbing on the rolling pin.

gingerbread02.jpg

After two rollings, I elected to form the rest of the dough into small rounds. Cookies turn tougher with each batch you roll out, but I can't bear to throw away the remaining dough.

This recipe produced crunchy cookies, much like gingersnaps. They taste pleasantly spicy, with a strong molasses flavor. For a softer small cookie, bake for less than eight minutes.

Cousin C helped with the cookies today. She's older than A and B, and certainly seems to have experience, but it's hard to keep her interest for long in activities not involving driving a Mario Kart vehicle off a bridge. Oh well.

gingerbread01.jpgGingerbread Cookies
Source: The King Arthur Flour Cookie Companion
Yield: 3 dozen 3-inch cookies

3/4 cup (6 oz) unsalted butter
3/4 cup (6 oz) brown sugar, packed
3/4 (9 oz) cup molasses
1 teaspoon salt
2 teaspoons cinnamon
2 teaspoons ground ginger
1/4 teaspoon allspice or cloves
1 large egg
1 teaspoon baking powder
1/2 teaspoon baking soda
3 1/2 cups (14 3/4 oz) flour

1. In a saucepan set over low heat, or in the microwave, melt butter, then stir in the brown sugar, molasses, salt, and spices. Transfer the mixture to a medium-sized mixing bowl, let it cool to lukewarm, then beat in the egg.

2. In a large bowl, whisk the baking powder and soda into the flour, and then stir these dry ingredients into the molasses mixture. Divide the dough in half, and wrap well. Refrigerate for 1 hour or longer.

3. Preheat your oven to 375°F. There's no need to grease the baking sheets.

4. Once the dough has chilled, take one piece of dough out of the refrigerator, and flour a clean work surface, and the dough. Roll it out as thin or thick as you like; for slightly less crisp cookies, roll it out more thickly.

5. Use flour under and on top of the dough to keep it from sticking to the table or rolling pin. Alternatively, place the dough on parchment, and put a sheet of plastic wrap over it as you roll, pulling the plastic to eliminate wrinkles as necessary when rolling; this will keep dough from sticking without the need for additional flour. For soft dough, or dough to be rolled extra-thin, you may choose to roll right onto the ungreased back of a baking sheet.

6. Cut out shapes with a cookie cutter, cutting them as close to one another as possible to minimize waste.

7. Transfer the cookies to ungreased cookie sheets (or, if you've rolled right onto the parchment, remove the dough scraps between the cookies). Bake the cookies just until they're slightly brown around the edges 8 to 12 minutes, or until they feel firm. Let the cookies cool on the baking sheets for several minutes, or until they're set. Transfer them to a rack to cool completely. Repeat with the remaining dough.

Cookie Calendar: Fruit-Flavored Cookie Dough

fruit-flavored01.jpgRemember the Pinwheel Cookies? Here's another dough to swirl into those fancy rounds, one that will light up kids' eyes with its psychedelic color.

The secret ingredient that transforms this dough from plain vanilla to a vivid hue is one 3-oz. box of flavored gelatin. You can use whatever flavor makes you happy, but I'm employing strawberry and lime for their Christmas-y colors.

My dough is chilling in the fridge, waiting for kids to come roll it into pretzels (I'll post that recipe soon), but tasted raw, the fruit flavor is as faint as the recipe warns. However, it does have the distinct sour tang of fruity gelatin. We'll see if it lasts when baked.

I made this and one other dough tonight. Wrapped in wax paper and sealed in gallon-sized zipper bags, they'll wait for me to have the time to roll them out. I often stockpile doughs in the fridge when doing my holiday baking, as it's much more efficient to keep reusing the ingredients and tools I have out without stopping to bake.

If you can't wait to bake this dough, visit the Pittsburgh Tribune-Review's web site, which has an excerpt from The King Arthur Flour Cookie Companion giving you recipes for the two other dough flavors plus instructions for the many cookie varieties you can craft from them.

P.S.: Yesterday's sugar cookie entry is now updated, with my baking experiences and beautiful photos. Check it out. Now.

Fruit-Flavored Cookie Dough
Source: The King Arthur Flour Cookie Companion
Yield: Depends on the baking method

3 tablespoons (3/4 ounce) confectioners' sugar
1 (4-serving size) package fruit-flavored dry gelatin mix
3/4 cup (1 1/2 sticks, 6 ounces) unsalted butter
1/2 teaspoon salt, extra-fine preferred
1 1/2 teaspoons vanilla extract
1 1/2 cups (6 1/4 ounces) unbleached all-purpose flour

In a medium mixing bowl, cream the sugar, gelatin mix, butter, salt and vanilla. Add the flour, stirring to make a cohesive dough. Flatten the dough into a disc, wrap in plastic wrap and refrigerate until ready to use.

Cookie Decorating, Casual and Fancy

The Bakers' Banter blog at King Arthur Flour's web site is a great year-round resource for step-by-step baking instruction. Now, with Christmas on the horizon, the busy bakers have turned their rolling pins toward festive cookies.

Are you a baker who prefers mixing and measuring to messing with icing? Check out PJ Hamel's two cookie-decorating posts for tips on how to churn out beautiful cookies with minimal trouble:

Fancy holiday cookies, without the fuss.

Holiday magic with gingerbread cookies: the inside-out cut.

If, on the other hand, you enjoy the art of piping dots and strings or think a cookie's not complete without an intricate, sugared design, you must read the post by new blogger MaryJane Robbins, who creates some amazingly beautiful jumbo cookies:

The Other Cookie Baker

Of course, if you believe form follows function, try PJ's elegant, chocolate-dipped approach to cookie decoration to create a European-style treat:

The REAL holiday crunch: Vanilla Dreams

Cookie Calendar: Peppermint Candy Canes

candy-canes01.jpg

I'm well settled in here at home for the holidays, so today my small cousins and I plunged into baking the first cookies of the Christmas season.

Cousin A, the youngest in the family, declared mint to be his favorite flavor, so we kicked off with Peppermint Candy Canes. I had set this recipe, along with a few other hands-on, cutesy choices, aside specifically for cousin-baking projects, so it all worked out well.

candy-canes04.jpg

I enjoy baking with kids of all ages. You get to discover where each kid's strengths lay, and you can watch them learn rapidly. For example, B, A's older brother, dove right into making the "snakes" we used to make the candy-cane stripes but had difficulty rolling a long, even cylinder. But with the help of a little flour and practice, he produced snakes as well as me by the end.

candy-canes02.jpg

When you bake with kids, certainly consider their ages when deciding how much to let them help, but don't underestimate them. No, don't give them a bunch of carrots and a sharp knife and then leave the room, but yes, let them measure, stir, and crack eggs. Show them how it's done; guide their hands the first time if needed. Kids learn quickly.

If you have slightly older kids working with you, don't forget to include some math, too: "If we need two tablespoons, and there's three teaspoons in a tablespoon, how many teaspoons do we need?" Some kids grasp multiplication intuitively this way.

And the cookies? Yummy - crisp outside, with a creamy mint flavor. But beware: They're delicate, especially along the seams. Be very careful prying them up and don't drop them!

candy-canes01.jpgPeppermint Candy Canes
Source: adapted from The King Arthur Flour Baker's Companion
Yield: about 36 candy cane cookies

5⅓ tablespoons (2⁵⁄₈ ounces) butter
⅓ cup (2⁵⁄₈ ounces) vegetable shortening
¾ cup (5¼ ounces) sugar
1 teaspoon baking powder
¼ teaspoon salt
1 large egg
1 tablespoon milk
½ vanilla extract
½ teaspoon peppermint extract
2 cups (8½ ounces) flour
1 to 2 teaspoons red food coloring
Sparkling sugar

1. Beat butter and shortening about 30 seconds with an electric mixer.

2. Beat in sugar, baking powder, and salt. Scrape the bowl occasionally.

3. Beat in egg, milk, and extracts.

4. Beat in as much flour as you can with the mixer. Mix in the rest with a wooden spoon.

5. Color ¼ of the dough red. Divide the rest of the dough in half. Color half pink. Chill the dough 30 to 60 minutes.

6. Preheat the oven to 375 degrees Fahrenheit.

7. Divide each dough portion into six pieces. Roll each piece into a 12-inch rope. Lay the ropes side by side on a lightly floured surface, alternating colors. Roll the ropes with a rolling pin into a single 14 x 9-inch rectangle about ¼ inch thick.

8. Use a pizza wheel to cut the rectangle diagonally into ½-inch-wide strips. Cut the strips into pieces 5 to 7 inches long. [I sliced once across the whole rectangle with the pizza cutter.] Press the shorter pieces together if necessary. Place on an ungreased cookie sheet. Curve one end of each piece to form a candy cane, then sprinkle each candy cane with sugar.

9. Bake for 7 to 8 minutes, until the edges are firm and bottoms are very lightly browned. Transfer to racks to cool.

Cookie Calendar: King Arthur's Special Roll-Out Sugar Cookies

cookiecalendar.jpgRecipes like these are what make me wish I left more than spilled ingredients on my cookbooks.

I'm constantly on the lookout for a reliable recipe for roll-out cookies that hold up to cutting with intricate cutters and to decorating. The problem is, every year I forget what sugar cookie recipes worked (or didn't) the year before.

Because. I. never. write. it. down!

I know I attempted this sugar cookie recipe a couple years ago. There was flour cemented to the page as evidence! But I can't remember if they spread and puffed, ruining the pretty cookie shapes.

It's a problem, because I need to choose a recipe for this year's attempt at fir trees and snowmen. I'm considering this recipe, but I'm leaning toward either another one from the same book called "Decorator's Dream Cookies" or the "Holiday Cookies" from my new America's Test Kitchen Family Baking Book. I have also eyed the Pioneer Woman's recipe for Christmas cut-out cookies, which have an interesting painting technique.

Ack! I can't decide.

I'm actually planning to make two sugar cookies this year. One I'll use for fancy shapes and decoration, and the others I'll probably scoop straight from the bowl onto the pan for rounds I can slather in that accursed margarine frosting that apparently it wouldn't be Christmas without.

I still refuse to go the route of pre-made dough even for those, though. Principles, people!

One thing, though -- even if I can't remember whether these cookies puffed and spread, I do know that at least they are tasty!

King Arthur's Special Roll-Out Sugar Cookies
Source: The King Arthur Flour Cookie Companion
Yield: 42 cookies

1 cup (2 sticks, 8 ounces) unsalted butter
1 cup (7 ounces) sugar
¾ teaspoon salt
1½ teaspoons baking powder
2 teaspoons vanilla extract
½ teaspoon almond extract (optional)
1 large egg
¼ cup (2 ounces) heavy cream or sour cream
3 tablespoons (¾ ounce) cornstarch
3 cups (12¾ ounces) unbleached all-purpose flour

1. In a medium-sized bowl, beat the butter, sugar, salt, baking powder, vanilla, and almond extract until light and fluffy. Add the egg and beat well. Add half the cream, all of the cornstarch, and half the flour; beat well. Add the remaining cream and flour, mixing just until all of the ingredients are well incorporated.

2. Divide the dough in half, flatten into rounds, and wrap well. Refrigerate for 1 hour or more, to facilitate rolling.

3. Preheat the oven to 350 degrees F. Lightly grease (or line with parchment) two baking sheets.

4. Transfer the chilled dough to a lightly floured work surface and place a piece of plastic wrap over it while you roll it out to keep it from sticking to the rolling pin. Roll the dough to ¹⁄₈ to ¼ inch thick. Cut it into shapes of your choice and transfer to the prepared baking sheets.

5. Bake the cookies for 10 to 12 minutes, until they're set but not browned. Remove them from the oven and let cool for 5 minutes on the baking sheet before transferring to a rack to cool completely. Use a metal spatula to pick up one cookie; if it seems fragile or breaks, let the cookies continue to cool until you can handle them easily.

Cookie Calendar: Cherry-Nut Rugelach

cookiecalendar.jpgRugelach arrived in this country from Eastern Europe, much like I did a few months ago.

OK, they might have spent more time there than I did.

Regardless, their Eastern European roots help explain why this cookie variety is so often associated with Jewish holidays, including Hanukkah. Eastern Europe at one time boasted a vibrant Jewish community, from Germany and the Czech Republic through Poland to Russia (and more, of course).

My family isn't Jewish, but enjoying cookies like rugelach doesn't require knowing the difference between Yom Kippur and Rosh Hashanah. Though we celebrate Christmas in December rather than Hanukkah, I make rugelach every year I have an oven.

I usually make the simpler Kraft recipe for rugelach since it goes over better with my family, but this cinnamon-y dried cherry filling is my personal preference. I made them in Las Vegas before heading home one year and shared them with my co-workers. Deeeeeelicious.

Rugelach dough tastes like a flaky pie crust, and but the filling is on the scant side since you don't create a pocket to hold it. Make sure you bake them on parchment, as otherwise you'll have a hard time scraping up the sticky filling bubbling out the edges.

Cherry-Nut Rugelach
Source: The King Arthur Flour Cookie Companion
Yield: 64 cookies

Dough
1 cup (2 sticks, 8 ounces) unsalted butter
One 8 ounce package cream cheese (reduced fat or full fat)
½ cup (3½ ounces) sugar
1¼ teaspoons salt
3 cups (12¾ ounces) unbleached all-purpose flour

Filling
1 cup (4⁵⁄₈ ounces) dried cherries
¾ cup (3 ounces) walnuts, toasted
1 cup (7 ounces) sugar
¼ cup (2 ounces) unsalted butter, melted
2½ teaspoons cinnamon
¼ teaspoon salt

Topping
1 large egg beaten with 2 teaspoons water
Granulated, coarse, or pearl sugar

1. To make the dough: In a large bowl, beat the butter and cream cheese until light. Add the sugar and salt and beat until fluffy. Stir in the flour, the gather the dough into a ball and knead it until it's smooth and all the flour is incorporated.

2. Divide the dough into 8 equal pieces, roll each into a ball, then flatten each slightly into thick disks. Wrap each in plastic wrap and refrigerate for 1 hour or longer.

3. Preheat the oven to 350 degrees F. Lightly grease (or line with parchment) two baking sheets.

4. To make the filling: Combine the filling ingredients in a food processor and pulse a few times (or finely dice the cherries and walnuts, add the remaining filling ingredients, and blend well).

5. To shape the cookies: Work with one dough disk at a time, and keep the others refrigerated. On a piece of parchment or a lightly floured work surface, roll the dough into an 8-inch circle. Place a small round lid (from a film canister, a salad dressing bottle, or something similar-sized) in the center of the circle. Spread ¼ cup of the filling over the dough, leaving ½ inch uncovered around the outside edge of the circle.

6. Remove the lid and use a sharp knife or pizza wheel to cut the circle into 8 equal wedges. Starting at the wide (outside) edge of each wedge, roll it toward its narrow edge, as you would a crescent roll. Place the rolled wedges, tip down, on the prepared baking sheets. Curve each cookie into a crescent shape. Repeat this process with the remaining dough.

7. Brush each cookie with some of the beaten egg mixture and sprinkle with sugar. Bake the rugelach for 20 minutes, or until they're golden brown. Remove them from the oven and transfer to a rack to cool.

Cookie Calendar: Holiday Bonbons

cookiecalendar.jpgMarzipan.

Frankly, that's enough to sell me on any cookie. I have a deep and abiding love for this sweetened paste made from bitter almonds, rivaled only by my love for buttery toffee.

As soon as I stumbled upon the recipe for Holiday Bonbons in my King Arthur Flour Cookie Companion, I knew they were on my list for the upcoming Christmas baking season. No doubt an eerie glow of greed haunted my eyes from the moment I picked up the marzipan log in the store until I baked the cookies themselves.

Alas, not every recipe can live up to such lofty expectations. While Holiday Bonbons are a tasty cookie (and one that my husband gobbled up speedily), they're not quite as overpoweringly delicious as biting straight into the leftover marzipan.

But they're sure a great excuse to have some leftover marzipan.

My cookies turned out a little too large the last time I made them. Unfortunately, the recipe offers only visual sizing guidelines, no specific weight or volume measurements. However, it does specify that you should end up with precisely 27 cookies. If I make these again this year, I will use my bench knife to divvy up the dough before rolling it, much like I did with yesterday's Jam Thumbprints.

Need a little help with that technique?

Ideally, you would use a scale, set to measure in grams, to ensure accurate division, but if you feel confident eyeballing your dough, then dive right in.

  • Form the dough into an even log and divide it into thirds (3 pieces).
  • Even out each pieces, then divide each third into thirds (9 pieces).
  • Repeat the previous step to end up with 27 pieces of cookie dough.


Use the same procedure on your filling to ensure you have enough to go around.

Holiday Bonbons
Source: The King Arthur Flour Cookie Companion
Yield: 27 cookies

Dough
1 cup (2 sticks, 8 ounces) unsalted butter
1½ cups (6 ounces) confectioner's sugar
1 tablespoon vanilla extract
¾ teaspoon salt
2½ cups (10½ ounces) unbleached all-purpose flour

Filling
½ cup (4½ ounces) almond paste, praline paste, or marzipan
1 tablespoon unsalted butter
¹⁄₈ teaspoon almond oil, or ½ teaspoon almond extract (omit if you use praline paste)
¼ cup (1 ounce) confectioners' sugar (omit if you use marzipan)
½ cup (1¹⁄₈ ounce) soft, fresh bread crumbs

Glaze
1¼ cups (7½ ounces) chocolate chips
2 tablespoons (1 ounce) unsalted butter
2 tablespoons (1³⁄₈ ounce) light corn syrup
Sliced almonds for topping, optional

1. Preheat the oven to 350 degrees F.

2. To make the dough: In a medium-sized mixing bowl, beat the butter until light. Add the sugar, vanilla, and salt and beat until fluffy. Add the flour and stir until a firm dough forms.

3. To make the filling: Crumble the almond paste into a small bowl. Beat in the butter, almond oil, and sugar. When the mixture is smooth, add the bread crumbs and mix until blended.

4. To shape the cookies: Roll the filling into grape-sized balls. Break off a piece of dough the size of a table-tennis ball and use your thumb to make a deep indentation in the center. Place a ball of filling in the indentation, then bring the dough up and over to enclose it, rolling it in your hands to make a smooth ball. Repeat with the remaining filling and dough.

5. Place the bonbons on two ungreased (or parchment-lined) baking sheets and bake them for 14 minutes. They won't brown, which is OK. Let the bonbons cool on the baking sheet for 10 minutes (they're fragile when hot) before transferring to a rack to cool completely.

6. To make the glaze: Melt the chocolate chips in a microwave or double boiler. Add the butter and corn syrup, stirring until smooth and glossy.

7. Dip the tops of the cooled bonbons in the glaze. If the glaze thickens, reheat it briefly, then continue dipping. Top each with an almond slice or two, if desired. Let the bonbons sit for several hours until the glaze hardens, then store them in an airtight container.

Cookie Calendar: Butterscotch Sundae Cookies

cookiecalendar.jpgI baked this recipe not for Christmas but for an end-of-year picnic for my third graders a couple years ago. They aren't fancy or especially pretty looking, truth be told. Nevertheless, these homely drop cookies would make a perfectly tasty addition to the dessert tray.

The idea of ample caramel flavors combined with one of my favorite nuts (pecans) was enough to overcome my reluctance to present a bowl of not-sugar/chocolate chip cookies to a passel of kids. The adults in the crowd at least could appreciate the flavors.

Butterscotch Sundae Cookies emerge crispy, especially around the edges. The edges actually are a bit delicate because of this; watch out for spread and store the finished cookies carefully to avoid breakage.

Butterscotch Sundae Cookies
Source: The King Arthur Flour Cookie Companion
Yield: 3½ dozen cookies

3 tablespoons (1½ ounces) plus ¾ cup (6 ounces) unsalted butter
2 cups (8 ounces) small pecan halves, or use coarsely chopped larger pecans
¾ teaspoon plus ¼ teaspoon salt
1⅓ cups (10⁷⁄₈ ounces) dark brown sugar
A few drops butter-rum flavor, to taste
2 large eggs
½ teaspoon baking powder
¼ teaspoon baking soda
2 cups (8½ ounces) unbleached all-purpose flour
1 cup (6 ounces) butterscotch chips

1. Preheat the oven to 375°F. Lightly grease (or line with parchment) two baking sheets.

2. In a medium-sized skillet, melt the 3 tablespoons butter over low heat, and add the pecans. Stir for a couple of minutes, until the nuts begin to brown and smell toasty.

3. Sprinkle with ¾ teaspoon of the salt, stir to combine, and remove the pan from the burner. Transfer the nuts to a small bowl.

4. In a medium-sized mixing bowl, cream together the remaining ¾ cup butter, sugar, and butter-rum flavor, then beat in the eggs. Beat in the remaining ¼ teaspoon salt, baking powder, and baking soda, then stir in the flour, reserved pecans, and chips.

5. Drop the dough by the tablespoonful onto the prepared baking sheets. Bake the cookies for 13 minutes, until they're a deep golden brown. Remove them from the oven, and transfer to a rack to cool.

Cookie Calendar: Sparkling Cranberry Gems

cranberry-gems04.jpg

It's officially December 1, which sounds like an excellent date to kick off this year's Cookie Calendar!

While you likely aren't planning to start your holiday baking for at least another week or two, now's a great time to start browsing recipes. Check out last year's Cookie Calendar for instant inspiration.

cranberry-gems01.jpg

I'm kicking off my holiday season with the cookies I baked for Thanksgiving this year. While they feature an ingredient most often associated with Turkey Day - cranberries - the red color and shiny sugar sparkles make them a perfect fit for Christmas as well.

While I loathe giving up control over my holiday dinners, I am pressed every year to outsource some dishes. I cave, of course, because it's terribly rude to refuse a guest's thoughtful offer to help out, plus it's not so nice on my part to hog all the spotlight.

Much as I adore it.

I opted to farm out dessert this Thanksgiving. As I mentioned before, I don't relish pie making. My crust dough is invariably disastrous in some way: It crumbles, sticks to the counter, tears, slides, sticks to the pan, or turns sodden.

But pie is a must on Thanksgiving! So I told people who asked to bring pie. Sure, I might also have mentioned cake or cobbler, but mostly, I talked pie.

And so, we ended up with three variations on streusel-topped apple pie at our Thanksgiving feast.

Whoops. But, lucky for me, it's my favorite!

I swear it was a coincidence.

cranberry-gems02.jpg

The cranberry cookies I'd baked broke up the pie parade a bit, though the cookie dough bore a striking resemblance to pastry. Instead of creaming the butter and sugar, you "reverse cream" this dough by cutting the butter into the mixed flour and sugar.

Once you achieve pea-sized pieces of butter (I used the whisk attachment on my stand mixer to get there, but frankly I wonder if the whole business could have been completed in the food processor), you drizzle in milk to bring the dough together. If you've ever made biscuits or pie crust, you know the drill.

After dissing teaspoon cookie scoops in my last post, here I go stumbling onto a recipe that requires one. I eyeballed it and produced cookies that were generally even, but they must have been too large as I ended up with 25, not 36.

cranberry-gems03.jpg

Do you need sparkling sugar? Regular white sugar would probably melt into the cookies, negating their sparkle. I could only find white sparkling sugar by making a special trip to the craft store. A commenter at King Arthur's site suggests using demerara sugar, but though it may be chunky, it is most definitely brown, not sparkly clear. You definitely need the extra sugar for taste and texture, but it's up to you whether to go with aesthetics or convenience.

My comments in [brackets].

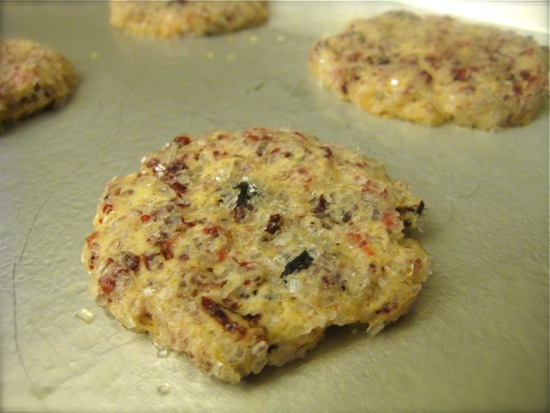
cranberry-gems04.jpgSparkling Cranberry Gems
Source: King Arthur Flour [Visit the site for a picture of the ideal results.]
Yield: 36 cookies [I had 25.]

Cookies
1 cup (4¼ ounces) King Arthur White Whole Wheat Flour, organic preferred; or King Arthur Unbleached All-Purpose Flour [I used all-purpose flour.]
1 1/2 cups (7 ounces) dried cranberries, packed
2 tablespoons (½ ounce) confectioners’ sugar
1 teaspoon baking powder
1/4 teaspoon salt
1 teaspoon vanilla extract
6 tablespoons (3 ounces) cold unsalted butter, cut into pats
3 tablespoons (1½ ounces) milk

Coating
⅓ cup (3 ounces) coarse white sparkling sugar
¹⁄₈ teaspoon tart and sour flavor (optional, but very good) [Good grief, it was hard enough finding white sparkling sugar. I didn't go here.]

Place the flour and dried cranberries in the bowl of a food processor. Process until the cranberries are coarsely shredded. Imagine a single dried cranberry cut into about 4 pieces: that’s your goal.

Preheat the oven to 350°F. Lightly grease (or line with parchment) two baking sheets.

Whisk together the flour/cranberry mixture, sugar, baking powder, and salt. Add the vanilla and butter, mixing until the butter is thoroughly distributed, but some pea-sized chunks still remain. Dribble in the milk while mixing; the dough will become cohesive.

Place the coarse sugar and tart and sour flavor in a jar, and shake to combine thoroughly. Pour the sugar into a roomy plastic bag; about ½-gallon size should do.

Using a teaspoon cookie scoop (or a spoon), scoop the dough by 1¾-teaspoonfuls (about 1¼" balls) into the bag, 6 or 8 at a time. Close the top of the bag, and gently shake to coat the balls with sugar. Place them on the prepared baking sheet, and use the bottom of a glass to flatten them to about ¼" thick (about 1½" in diameter). Repeat with the remaining dough.

Bake the cookies for 16 to 17 minutes, until they’re set and barely, BARELY beginning to brown around the very edge; the tops shouldn’t be brown at all. Remove them from the oven, and cool right on the pan.

Salty Oatmeal Cookies Recipe

salty-oatmeal-cookies01.jpg

The recipe title alone sounded so intriguing that I had decided to make these Salty Oatmeal Cookies before I read on and discovered . . . another roll-out cookie!

If Homer Simpson became a baker, he might yelp, "Dough!"

Tee-hee. I crack myself up.

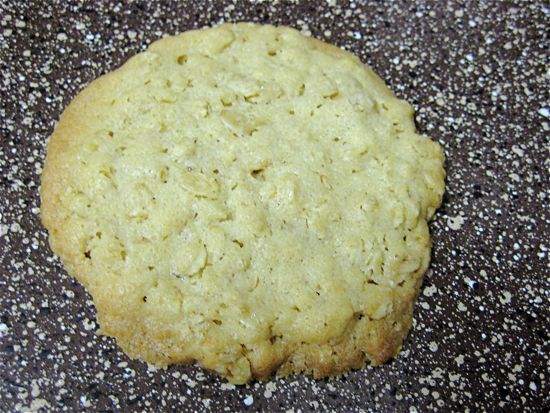
Honestly, I tried to roll the suckers out, but this dough did not seem at all suited to it. The large oat flakes caused the dough to break apart whenever I lifted it. Thus, I was back to scooping and flattening with a floured glass bottom.

The recipe could use some more detail, frankly. Nowhere does it tell me how big each cookie should be, so there's no way I was going to emerge with three dozen cookies. Also, it would have been helpful to know how much these cookies spread before I crowded a ton onto the first tray.

So here's your warning: They spread a lot. Allow space.

salty-oatmeal-cookies02.jpg

Salty Oatmeal Cookies don't resemble the classic recipe off the top of the Quaker Oats carton. White sugar makes for a very light cookie, and of course, no raisins enter the picture. The cookies also lack the warm spices that make their way into many oatmeal cookie recipes in favor of plain, simple salt.

I elected to use kosher salt rather than table salt for gilding the cookies. I've read larger flakes are better accents, with the texture adding a little crunch. Plus, it's a bit prettier.

salty-oatmeal-cookies03.jpg

Tastewise? I don't know. I think brown sugar, with its more caramel flavor, would be a better base. The cookie flavor as is reminds me strongly of a honey-wheat pretzel, with a slightly sweet, grainy base and strong saltiness.

Not bad. I could see it growing on me. They're a decent snack.

Interested in this recipe? Check out a few other bloggers who have tried it:
Culinary in the Country: Trying to keep my hand out of the cookie jar . . .
The Everyday Gourmet: Salty Oatmeal Cookies

My recipe comments in [brackets].

salty-oatmeal-cookies01.jpgSalty Oatmeal Cookies
Source: The King Arthur Flour Cookie Companion
Yield: 3 dozen cookies

½ cup (3¼ ounces) vegetable shortening
½ cup (1 stick, 4 ounces) unsalted butter
1 cup (7 ounces) sugar
1 large egg
1½ cups (6¼ ounces) unbleached all-purpose flour
½ teaspoon salt, plus more for sprinkling [I used kosher salt for sprinkling]
½ teaspoon baking soda
1 teaspoon vanilla extract
3 cups (10½ ounces) rolled oats

1. In a large mixing bowl, cream together the shortening, butter, and sugar until light. Beat in the egg. In another bowl, whisk together the flour, salt, and baking soda and stir into the sugar/shortening mixture. Mix in the vanilla and oats. Cover the bowl and chill the dough for 30 minutes.

2. Preheat the oven to 375 degrees F. Lightly grease (or line with parchment) two baking sheets.

3. Remove the dough from the refrigerator and roll it ¼ inch thick on a lightly floured work surface. Cut it into shapes with your favorite cutter, or simply cut it into squares or diamonds, using a pizza wheel or a sharp knife. Lightly sprinkle the surface of the dough with salt.

4. Bake the cookies for 10 to 12 minutes, until they're just lightly colored at the edges. Remove them from the oven, let rest on the baking sheets for 5 minutes, then transfer to a rack to cool completely.

Chocolate Snaps

chocolate-snaps03.jpg

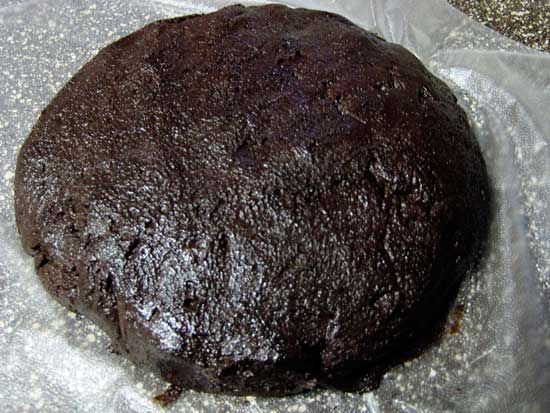
I waited until the witching hour, but I finally managed to bake the Halloween cookies I've been planning all month.

Not that I haven't been baking. I've churned out several loaves of bread (two this past week alone), a couple batches of muffins, and two dozen carrot cupcakes with pumpkin-hued cream cheese frosting to get us in the Halloween mood.

Mmm. Carrot cake. Aaaauuughhhhh.

Anyway, I decided that Halloween demanded dark chocolate cookies, especially since I'd already gone the fall-spice route with the cupcakes. Preferably, cookies made from a recipe calling for Dutch-process cocoa, which produces baked goods as black as my wicked heart.

chocolate-snaps01.jpg

And black my heart felt after struggling fiercely with this extremely soft dough. I chilled it for three hours, which was the minimum suggested, but I doubt a longer rest would have helped matters. Maybe a nice marble gravestone to roll on . . .

I heavily floured the countertop, as instructed, but the cookies sucked it up like vampires at a blood bank. I managed to get three cookies off the counter without resorting to my bench scraper. The rest got reformed into circles on the baking sheet.

Next, I tried patting the dough out straight onto the cookie sheet with my hands, punching out the cookies and pulling off the excess. That method worked all right, but the dough still stuck the rolling pin and it was a pain to peel up the excess.

I tried slicing a log of dough, but the soft dough squished into little rectangles. I couldn't slice it thin enough, either. Still, this method yielded some success when I rolled the cut dough into balls, placed them on the cookie sheets, and pressed them flat with a greased glass bottom.

I cast a spell on you, recipe, and now you're mine!

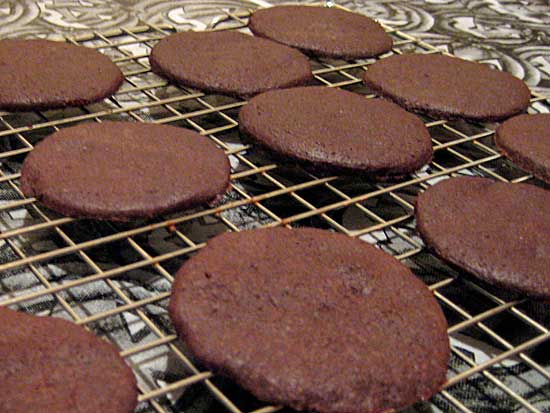
A ghost of a problem: The flattened cookies turned out bigger than the 2-1/4 inches called for in the recipe, so I only ended up with 53 cookies, far from eight to nine dozen. I never hit the recipe yield right, though, so no big deal.

chocolate-snaps02.jpg

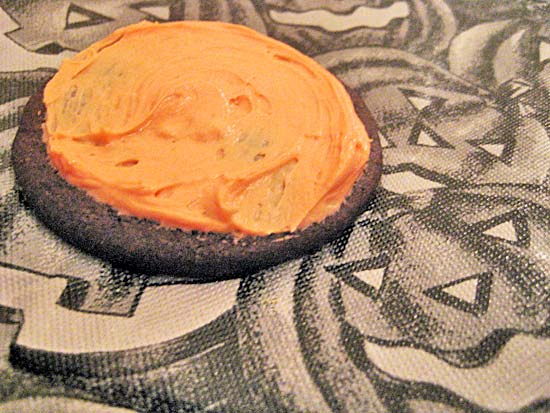
The cookies taste a lot like slightly soft Oreos, appropriate since one of the variations calls for sandwiching them around a creamy filling. If you love the classic lunchbox cookie, you'll enjoy these.

I usually avoid roll-out cookies (and pie dough) because of these hassles. They're the monsters under my baking bed; the boogeymen in my cookie closet. But tonight, I persevered and triumphed; the brains of Frankenstein combined with the cunning of the Wolfman pulled me through the ordeal.

Happy Halloween!

My comments in [brackets].

chocolate-snaps03.jpgChocolate Snaps
Source: King Arthur Flour Cookie Companion: The Essential Cookie Cookbook
Yield: 8 to 9 dozen cookies [I ended up with 53 cookies]

1-1/2 cups (6-1/4 ounces) unbleached all-purpose flour
3/4 cup (2-1/4 ounces) Dutch-process cocoa powder [natural cocoa is given as a possible substitution, but your cookies will turn out reddish rather than blackish]
1/2 teaspoon salt
1/2 teaspoon baking powder
3/4 cup (1-1/2 sticks, 6 ounces) unsalted butter
1 cup plus 2 tablespoons (8 ounce) sugar
1 large egg
1 tablespoon water
1 teaspoon vanilla extract

1. In a medium-sized mixing bowl, whisk together the flour, cocoa, salt, and baking powder, whisking until no lumps remain. In a separate, larger bowl, beat the butter until light. Add the sugar and continue beating until it's well incorporated. Then add the egg, water, and vanilla and beat for at least 2 minutes, until the mixture has lightened both in color and texture. [The change is dramatic.] Gently mix in the dry ingredients.

2. Shape the dough into a flattened disk. Wrap in plastic wrap and refrigerate for 3 to 4 hours, or overnight. This dough is very soft, so it's imperative that it's been chilled before you roll it out.

3. Preheat the oven to 325 degrees F. Lightly grease (or line with parchment) two or three baking sheets. [Actually, if you rolled the cookie dough out on the parchment, transferred the paper to the sheet, cut the cookies, and removed the excess, that might work better than the coming step . . .]

4. On a clean, heavily floured work surface, roll the dough to a 1/8-inch thickness, and use a round cutter to cut it into 2-1/4-inch circles. Place the cookies on the prepared baking sheets. They won't expand a great deal, so you don't need a lot of space between them.

5. Bake the cookies for 17 to 18 minutes. (Watch them carefully; it's difficult to tell when they're done, as they're so dark you can't see if they're brown, but when you start to smell them they're probably done. If you smell even a whiff of scorching, remove them from the oven immediately.) Transfer the cookies to a rack and cool them completely.

Nutrition (1 cookie, 7 g): 30 calories, 1 g fat, 1 g protein, 2 g complex carbohydrates, 2 g sugar, 6 mg cholesterol, 14 mg sodium, 14 mg potassium, 14 RE vitamin A, 3 mg calcium, 8 mg phosphorus, 2 mg caffeine

Optional: Frost the cookies with orange-tinted Vanilla Yogurt Frosting for a spooky treat.

Lemon Coolers

lemon-coolers01.jpg

My husband and I stopped by Trader Joe's at the spur of the moment one day soon after moving to Seattle. We'd come from the university campus, where we'd had a light lunch at the history department's barbecue and then spent an hour or two soaking up the wonderful Internet joy at the library (after days without any in our new place). I was starving, having avoided most of the food at the barbecue, and why say no to a chance to pick up some Three-Buck Chuck along with a snack?

Wandering around, I grabbed whatever Trader Joe's specialty items I thought we might want in our still-barren kitchen, knowing it was unlikely I'd be coming back for at least a few weeks. Greek yogurt, check . . . maple granola, check . . . garbanzo beans . . . hmm, we could make hummus . . .

I sent Scott after a lemon to jazz up the potential hummus, and he returned with a whole bag. We left the store with a Mediterranean plate for snacking, three bottles of cheap wine, and way more food than I had intended to purchase, including now a whole mess of lemons.

I decided to find a cookie recipe for the extra citrus, as our kitchen was also in need of some dessert options. However, much like the still-unmade hummus, the cookies kept getting put off, and my choice of recipe changed as the next shopping day drew closer. So much for using what was already on hand.

All I really had to buy was cream cheese, though, to make Lemon Coolers, a recipe I had marked years ago in my King Arthur Flour Cookie Companion. I could easily justify the additional purchase -- now I'd finally get to try that roasted-vegetable sandwich spread I saw on Good Eats with the leftover cheese. Cookies happen for a reason.

Incidentally, that sandwich spread is divine. Mmm.

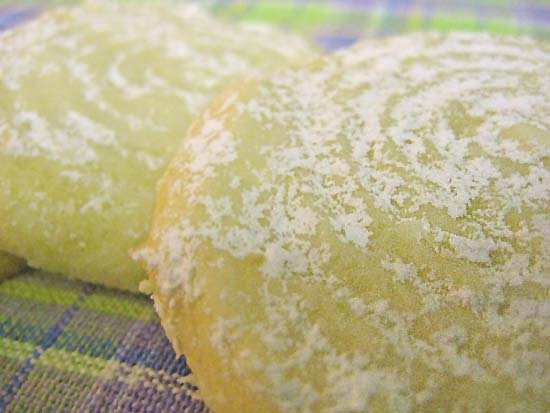
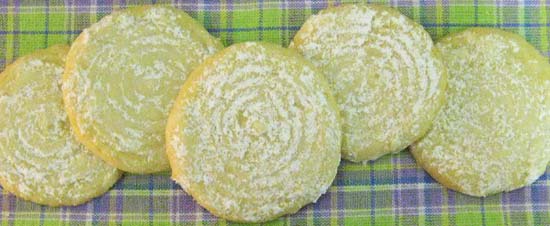
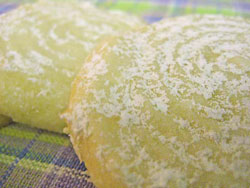
I elected to take a hint from the King Arthur baking blog and use the plunger from my food processor to flatten the cookies in lieu of a drinking glass. They held the pretty circles pattern well after baking, and my fear that the sugary coating would obscure it turned out to be unfounded.
lemon-coolers02.jpg

I skipped making the recipe's lemony sugar coating. In part, it was late and I didn't want to make more mess, but also I had zested all the lemons I could find just for the cookies themselves. I later turned up another lemon in the back of the crisper, but by then I'd dunked my cookies in plain confectioner's sugar.

If you make these cookies, though, I'd recommend buying more lemons than I did and giving the suggested coating a try. The lemon flavor in my cookies seemed muted at best, though it did gain in strength over the next couple of days. Still, I would have appreciated more lemon to balance out the sweetness and doughiness.

I'm not sure how else to describe the flavor. Floury, maybe? I would have said they weren't sweet enough except that I could taste plenty of confectioner's sugar. Maybe it's that they weren't rich enough. I did use full-fat cream cheese, though.

My cookies needed slightly longer than the stated 10 to 12 minutes to show any browning. Your mileage may vary.

The cookies were soft and delicate, as you might expect from a recipe incorporating confectioner's sugar into the dough itself. They stayed soft stored at room temperature for a few days. Be careful not to stack them crookedly, as they will bend over the edges and crack without support underneath.

I'd give these cookies three out of five stars. OK, but I probably wouldn't make them again.

My comments in [brackets].
lemon-coolers03.jpgLemon Coolers
Source: The King Arthur Flour Cookie Companion: The Essential Cookie Cookbook

Yield: 2-1/2 dozen cookies

Ingredients
Dough:
1 cup (2 sticks, 8 ounces) unsalted butter
1/2 cup (4 ounces) cream cheese
1/4 teaspoon salt
1/2 teaspoon baking powder
1 teaspoon grated lemon rind (zest) [I followed the suggested substitution and used 1-1/2 tablespoons total lemon zest instead of lemon oil]
1/4 teaspoon lemon oil [see above note]
1/2 cup (3-1/2 ounces) granulated sugar
1/2 cup (2 ounces) confectioners' sugar
2 cups (8-1/2 ounces) unbleached all-purpose flour

Coating: [I used just confectioner's sugar]
1 cup (4 ounces) confectioner's sugar
3/4 cup (5-1/4 ounces) granulated sugar, superfine preferred
2 tablespoons grated lemon rind (zest), or 1/4 teaspoon lemon oil

Directions
1. To make the dough: In a medium-sized mixing bowl, beat together the butter, cream cheese, salt, baking powder, lemon zest, and lemon oil. When the mixture is creamy, add the sugars, a bit at a time, beating until fluffy. Finally, mix in the flour. Cover the bowl and refrigerate the dough for 30 minutes.

2. Preheat the oven to 375 degrees F. Lightly grease (or line with parchment) two baking sheets. [They will try to stick, which is problematic with such delicate cookies.]

3. Scoop out about 2 level tablespoons of dough for each cookie (a tablespoon cookie scoop works well here) and roll each piece into a ball. [Um, you will not get 2-1/2 dozen cookies with 2 tablespoons of dough per cookie. I used one scoopful of dough for each cookie and they were plenty big.] Place balls on the prepared baking sheets and use the bottom of a drinking glass, dipped in confectioners sugar, to flatten them to a thickness of about 1/4 inch, and 1-3/4 to 2 inches in diameter. [Use a food-processor plunger for the circle design.]

4. Bake the cookies for 10 to 12 minutes, until they're lightly browned on the bottom and edges.

5. To make the coating: While the cookies are baking, make the coating. Combine the sugars in a food processor or blender and add the lemon zest. Process until well blended.

6. Allow the cookies to cool on sheets for about 5 minutes, then dip their tops into the coating. Place the cookies on a rack and let them cool completely. After they have cooled completely, shake more of the lemon sugar over them, or, if that's gone, cover them with confectioners' sugar; you want them to be well covered. [I actually didn't bother coating them a second time since my first coating didn't melt into the cookies the way it usually does.]