Showing posts with label Slice-and-Bake Cookies. Show all posts

Cookie Calendar: Marble Cookies

marble-cookies02.jpg

The next couple of recipes are variations on icebox cookie dough. We've already covered pinwheel cookies made with vanilla and chocolate doughs, and we also discussed whipping up fruit-flavored cookie dough. Now, we consider what else to do with all this dough!

Note that these recipes do use King Arthur Flour's recipes for vanilla and chocolate icebox dough. You can find the recipes for those doughs on the Pittsburgh Tribune-Review web site.

I whipped up these marble cookies using half the fruit-flavored dough I'd made (I saved the rest for tomorrow's pretzel cookies). I didn't set out to make marble cookies, but when I saw just how many hours checkerboard cookies entailed, marble cookies looked just so enticing.

marble-cookies01.jpg

Besides, marble cookies look a lot more like the "play-dough cookies" they sell at bakeries. Surprisingly, the dough does not get muddy looking from all the twisting and folding; each color remains distinct. The effect is elegant, much like the real deal, yet requires much less effort than either checkerboard or pinwheel cookies.

One warning: A lot of guests weren't too keen on the fruity doughs' flavor. I heard it compared to Trix cereal; I can't verify that as I've never tried Trix. There is a distinct Jello tang to the cookies. It might be less noticeable if you didn't mix two fruit-flavored doughs like I did.

It also might stand out less if you hadn't let your red dough sit in the fridge for more than I week like I did. Live and learn.

My comments in [brackets].

Marble Cookies
Source: The King Arthur Flour Cookie Companion
Yield: 4 dozen cookies

Prepare 2 recipes of cookie dough in different flavors -- vanilla and fruit, or vanilla and chocolate, for example. Place a piece of parchment or wax paper on a work surface. Lay 1 piece of dough on the parchment and roll it into a 12- by 9-inch rectangle. Set aside.

Using another piece of parchment or wax paper, roll the other piece of dough just slightly smaller than the first, into an 11 1/2- by 8 1/2-inch rectangle. Brush the Egg White Glaze [see below] over the larger piece of dough.

Tear the smaller piece of dough into irregular shapes and place them haphazardly onto the glazed dough. [The pieces can be stacked on top of each other.] Fold the dough in half crosswise, give it a quarter turn, then fold in half again. On the second fold, gently twist the dough as you fold, as though you were wringing out a cloth; this will increase the marbling effect. It will look messy, but that's OK.

Roll the dough into a log, smoothing the outside, wrap in plastic wrap or parchment and freeze until firm [about 30 minutes is fine].

Use a sharp knife to gently cut the log into 1/4-inch slices. If the dough becomes too soft to handle, place it back in the freezer briefly. Transfer the cookies to the prepared baking sheets.

Bake for 12 to 14 minutes, or until the cookies feel firm. Remove from the oven and transfer to a wire rack to cool.

Egg White Glaze

1 large egg white
1 tablespoon water

Whisk together the egg white and water until slightly foamy. Refrigerate until ready to use.

Date Lovers Unite!

. . . and bake some Date Pinwheels:

To us, dates are comforting, sweet, intense. A fresh Medjool date with a filling of cream cheese and some chopped nuts is one of the nicest things on earth. And at holiday time, it’s just not right unless a batch of Date Pinwheels (or two) gets made. They’re the perfect do-ahead cookie, because they need to be rolled and chilled before slicing. And they can certainly be made up and frozen, up to 2 months in advance.


By the way, if you're looking for a tasty hors d'oeuvre for your holiday parties, try stuffing a dried, pitted date with a whole almond, then wrapping the whole thing in 1/2 or 1/3 of a slice of bacon and baking until burnished. They're heavenly as is, but you can garnish them with crumbled blue cheese if you wish.

12 Days of Cookies: Stained Glass Wreath Cookies Recipe for MacGourmet

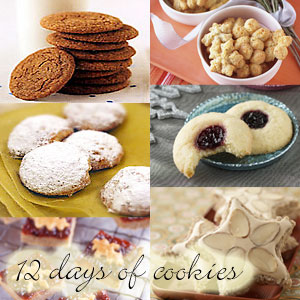
12daysofcookies.jpgIt took 12 days, but we finally got Sandra Lee's spin on store-bought cookie dough.

Unbelievably, this is the second recipe to call for store-bought cookie dough this year. Third, if you count Paula's snowflakes, which the e-mail said could be made with dough from a tube.

Food Network, what happened? Shouldn't cookie recipes include a cookie recipe?

While I'm willing to tolerate the heavy use of convenience products on the net's shows (though I can't help but roll my eyes every time the hosts insist that using a teaspoon from a spice packet or a squirt from a tomato-paste tube will "save money!" - that's bull), isn't the holiday season the one time of year to devote the time to baking from scratch? That's why busy people invented cookie swaps.

I just don't think I need instructions on how to place and bake Pillsbury sugar cookies.

And don't write to tell me your sob story about how you don't know how to bake. If you learned to read, you can bake. Heck, my three-year-old cousin can make cookie dough if you read him the recipe. Judging when the cookies are done baking is the hardest part, and Nestlé can't help you there.

Is this truly the last day for the 12 Days of Cookies? I won't post a round-up for this year until tomorrow passes with no bonus recipe. I hope a recipe does arrive tomorrow, as it's such a down note to end on a "recipe" that's really nothing more than decorating instructions.

Check out today's recipe on Food Network's site, or download Stained Glass Wreath Cookies into MacGourmet.

Cookie Calendar: Fruit-Flavored Cookie Dough

fruit-flavored01.jpgRemember the Pinwheel Cookies? Here's another dough to swirl into those fancy rounds, one that will light up kids' eyes with its psychedelic color.

The secret ingredient that transforms this dough from plain vanilla to a vivid hue is one 3-oz. box of flavored gelatin. You can use whatever flavor makes you happy, but I'm employing strawberry and lime for their Christmas-y colors.

My dough is chilling in the fridge, waiting for kids to come roll it into pretzels (I'll post that recipe soon), but tasted raw, the fruit flavor is as faint as the recipe warns. However, it does have the distinct sour tang of fruity gelatin. We'll see if it lasts when baked.

I made this and one other dough tonight. Wrapped in wax paper and sealed in gallon-sized zipper bags, they'll wait for me to have the time to roll them out. I often stockpile doughs in the fridge when doing my holiday baking, as it's much more efficient to keep reusing the ingredients and tools I have out without stopping to bake.

If you can't wait to bake this dough, visit the Pittsburgh Tribune-Review's web site, which has an excerpt from The King Arthur Flour Cookie Companion giving you recipes for the two other dough flavors plus instructions for the many cookie varieties you can craft from them.

P.S.: Yesterday's sugar cookie entry is now updated, with my baking experiences and beautiful photos. Check it out. Now.

Fruit-Flavored Cookie Dough
Source: The King Arthur Flour Cookie Companion
Yield: Depends on the baking method

3 tablespoons (3/4 ounce) confectioners' sugar
1 (4-serving size) package fruit-flavored dry gelatin mix
3/4 cup (1 1/2 sticks, 6 ounces) unsalted butter
1/2 teaspoon salt, extra-fine preferred
1 1/2 teaspoons vanilla extract
1 1/2 cups (6 1/4 ounces) unbleached all-purpose flour

In a medium mixing bowl, cream the sugar, gelatin mix, butter, salt and vanilla. Add the flour, stirring to make a cohesive dough. Flatten the dough into a disc, wrap in plastic wrap and refrigerate until ready to use.

Cookie Calendar: Sugar Cookies

ab-sugar-cookies02.jpg

What is Christmas without sugar cookies?

Linzers or spritz, frosted or stamped, homemade or store-bought, sugar cookies grace every holiday table in some form.

As I write this, I have two logs of Alton Brown's sugar cookie dough sitting in the fridge, waiting to be baked. Though he calls for rolling out the dough, I'll attempt to slice off cookies to avoid the hassle. I've read sticking it in the freezer for about half an hour before slicing helps the dough keep its shape. Maybe I made that up. We'll see tomorrow!

I'll update this post tomorrow to detail my experience getting from dough to cookie, plus let you know how they taste. I can tell you that everyone in the kitchen yesterday enjoyed the taste of the raw dough, as I had to keep batting off thieves!

ab-sugar-cookies01.jpg

The Next Day: I did freeze the dough for about 30 minutes before I sliced it. The extra firming made it a breeze to slice into 1/4-inch rounds. No rolling; no mush!

The dough did not spread or puff excessively in the oven, so I'd recommend it for fancy cutout cookies if you have the patience to roll out your dough. Below, you'll see the raw slice on the left, with a baked cookie to its right.

ab-sugar-cookies03.jpg

My cookies needed only seven minutes to bake, but mine were on the small side. In case you're unsure how to tell when your sugar cookies are done, check out these photos:

ab-sugar-cookies05.jpg

Notice that the cookie is just browning on the very bottom edge. When you pull out the cookies, you'll see a bare hint of golden brown right where the dough touches the pan.

ab-sugar-cookies04.jpg

The bottom will look much like this: mostly golden brown, with blond spots, yet no dark brown. I did, in fact, forget to set the timer for one tray of cookies, which took on a decidedly dark brown cast.

ab-sugar-cookies06.jpgSugar Cookies
Source: Alton Brown
Yield: about 3 dozen 2 1/2-inch cookies

3 cups all-purpose flour
3/4 teaspoon baking powder
1/4 teaspoon salt
1 cup unsalted butter, softened
1 cup sugar
1 egg, beaten
1 tablespoon milk
Powdered sugar, for rolling out dough

1. Sift together flour, baking powder, and salt. Set aside. Place butter and sugar in large bowl of electric stand mixer and beat until light in color. Add egg and milk and beat to combine. Put mixer on low speed, gradually add flour, and beat until mixture pulls away from the side of the bowl. Divide the dough in half, wrap in waxed paper, and refrigerate for 2 hours.

2. Preheat oven to 375 degrees F.

3. Sprinkle surface where you will roll out dough with powdered sugar. Remove 1 wrapped pack of dough from refrigerator at a time, sprinkle rolling pin with powdered sugar, and roll out dough to 1/4-inch thick. Move the dough around and check underneath frequently to make sure it is not sticking. If dough has warmed during rolling, place cold cookie sheet on top for 10 minutes to chill. Cut into desired shape, place at least 1-inch apart on greased baking sheet, parchment, or silicone baking mat, and bake for 7 to 9 minutes or until cookies are just beginning to turn brown around the edges, rotating cookie sheet halfway through baking time. Let sit on baking sheet for 2 minutes after removal from oven and then move to complete cooling on wire rack. Serve as is or ice as desired. Store in airtight container for up to 1 week.

Cookie Calendar: Pinwheel Icebox Cookies

cookiecalendar.jpgSometimes, you can't beat the taste of a good, basic butter cookie. Still, a plain vanilla cookie on the holiday platter is so . . . plain vanilla.

Pinwheel cookies give you the opportunity to gussy up a tasty treat for Christmas without a great deal of extra work. The tender cookies are rich and delicious, and the spiral pattern shouts, "Ooh, special!"

I made these vanilla-chocolate pinwheel cookies the year after I baked Alton Brown's Chocolate Peppermint Pinwheel Cookies. I'd admired the spiral design of those cookies, but I wanted a version that would be smaller (remember, smaller is better for holiday cookies - the big ones will all get ignored) and that didn't have crushed candy. The candy bits kind of scared people off, I think.

While they won't be the snazziest or most exotically flavored cookie you make, they'll be a good basic cookie that will please your pickier guests.

I've reworked the recipe a bit to follow a more standard format.

Pinwheel Icebox Cookies
Source: The Joy of Cooking
Yield: About 42 2½-inch cookies

1½ cups all-purpose flour
1½ teaspoons baking powder
¼ teaspoon salt
10 tablespoons (1¼ sticks) unsalted butter, softened
⅔ cup sugar
1 large egg
2 teaspoons vanilla
2 ounces bittersweet or semisweet chocolate, melted

1. Whisk together flour, baking powder, and salt in a medium bowl.

2. Beat butter and sugar in a large bowl until fluffy. Add egg and vanilla, and beat until combined. Stir in the flour mixture until blended.

3. Divide the dough in half. Knead the melted chocolate into half the dough. If the dough is soft, chill until firm.

4. Roll the white and brown doughs separately into equal sized ¹⁄₈-inch-thick rectangles, about 11 inches wide on the short side. Place the dark dough on the light dough and roll up like a jelly roll. Wrap the roll in parchment or wax paper and chill it until firm, 4 to 12 hours.

5. Preheat the oven to 375 degrees Fahrenheit. Grease or line 2 cookie sheets. Cut the log into ³⁄₁₆-inch-thick slices and arrange about 2 inches apart on the cookie sheets.

6. Bake, 1 sheet at a time, until the cookies are lightly browned, 8 to 10 minutes. The longer the baking time, the crisper the cookies. Let stand briefly, then remove to a rack to cool.

Cookie Calendar: Swedish Christmas Cookies

If you'd like to have fresh-baked cookies on Christmas with a minimum of fuss, then slice-and-bake is definitely the way to go. If you're like most (non-insane) people putting on a big party on Christmas Day, you'll probably be spending much of today in the kitchen prepping anyway, so why not whip up some cookie logs?

Food Network accompanies this recipe now with a picture of pastel-sugar-bedecked cookie rounds, but back when the recipe was first unleashed on the 12 Days of Cookies hordes, the picture dazzled us with a red-and-green holiday theme.

What colors of sugar your roll them in is up to you, but I did the mix of red and green when I baked these. I simply sprinkled both shades on my work surface, used my fingers to mix 'em up, and then rolled away.

Cookie Tip #23: Slice-and-bake logs in the freezer or fridge mean fast cookies with minimal effort at any time in the holiday season!

Swedish Christmas Cookies
Source: Food Network
Yield: About 3-1/2 dozen cookies

  • 2 ½ cups all-purpose flour

  • 2 teaspoons ground cardamom

  • ¼ teaspoon fine salt

  • 1 cup unsalted butter, (2 sticks), at room temperature

  • 1 cup confectioners' sugar

  • 1 large egg, room temperature

  • 1 tablespoon pure vanilla extract

  • 1 teaspoon finely grated lemon zest

  • Colored sanding sugars or chopped toasted pecans


Whisk the flour, cardamom, and salt in a bowl.

Put the butter and confectioners' sugar in a food processor, and process until smooth. Pulse in the egg, vanilla, and lemon zest until combined. Add the flour mixture and process to make a soft buttery dough. Divide dough in half onto 2 (12-inch long) sheets of plastic wrap, using the plastic, shape into rough logs. Refrigerate the dough logs for 30 minutes until just firm enough to shape into uniform logs, 8-inches long by 2-inches in diameter. Refrigerate until firm, at least 2 hours or overnight.

Preheat oven to 325 degrees F.

Scatter either the sanding sugars or toasted nuts on a work surface and roll the logs until completely coated. Cut into 1/4-inch thick cookies and space about 1 inch apart on parchment-lined baking sheets. Bake until golden around the edges, about 20 to 25 minutes. Cool cookies on the pan on wire racks. Store in an airtight container at room temperature for up to 2 weeks.

Download Swedish Christmas Cookies into MacGourmet.

Cookie Calendar: Shortbread Bites

Half an inch sure makes for one teeny-weeny cookie! If you have little kids around at the holidays, I bet these would make great "tea party" fare.

The square shape is also somewhat unusual for a cookie, and the sprinkles worked into the dough make it so festive. You could use red and green nonpareils for Christmas, true, but I liked the look of the rainbow ones too much to go any other way.

They look kind of reminiscent of that confetti icing they sell at the grocery store. I always longed for that stuff on cakes, but my mom was never a canned frosting kind of person.

Nowadays, I don't like icing much, and I'm often too impatient to wash everything up and make a batch after I've gone to all the trouble of baking. I do sometimes buy frosting in a can for cakes that must be frosted and aren't for me to consume. Hmm, sometime I need to relate my adventures in seven-minute frosting from this summer!

I digress! My big tip for these cookies is to underbake them a bit. I followed the directions here, and 18 to 20 minutes is waaaaay too long for butter cookies the size of nickels. When the bottoms are so very golden brown, the cookies turn all dry and crumbly rather than luscious and buttery. Start checking these puppies, I don't know, nine minutes in, and pull them once they look set.

Cookie Tip #21: Don't trust a recipe. Trust your senses! If they look set, they are done, even if it hasn't been 30 minutes. If they look dull, add sprinkles or candy bits. If they taste boring, add more vanilla or other flavoring next time. Just watch out when you start changing things such as the kind or amount of cocoa or acid used, as ingredients such as those might be balancing out another acid/alkaline ingredient that makes the cookie rise or come together.

Shortbread Bites
Source: Good Housekeeping

  • 1 ¼ cup(s) all-purpose flour

  • 3 tablespoon(s) sugar

  • ½ cup(s) (1 stick) butter (no substitutions), cold, cut into pieces

  • 1 tablespoon(s) red and green nonpareils or sprinkles or 1/2 cup mini baking bits


1. Preheat oven to 325 degrees F.
2. In food processor with knife blade attached, pulse flour and sugar until combined. Add butter and pulse until dough begins to come together. Place dough in medium bowl. With hand, gently knead in nonpareils or baking bits until evenly blended and dough forms a ball.
3. On lightly floured waxed paper, pat dough into 8" by 5" rectangle; freeze 15 minutes. Cut dough into 1/2-inch squares. Place squares, 1/2 inch apart, on ungreased large cookie sheet.
4. Bake cookies 18 to 20 minutes or until lightly browned on bottom. Transfer cookies to wire rack to cool. Repeat with remaining dough. Store cookies in tightly covered container at room temperature up to 1 week, or in freezer up to 3 months.

Nutritional notes:
NUTRITIONAL INFORMATION (per serving)
Calories 40
Total Fat 3g
Saturated Fat 2g
Cholesterol --
Sodium --
Total Carbohydrate 4g
Dietary Fiber --
Sugars --
Protein --
Calcium --

Download Shortbread Bites into MacGourmet.

Cookie Calendar: Cherry Rum Ribbons

Have you ever picked up those manufacturer-sponsored cooking magazines in the grocery store? I don't generally, and the few that I have came from other people, except for the Christmas ones.

Actually, I think the Land O Lakes Holiday Cookies magazine I picked up in 2005 was perhaps the only company-sponsored one-off Christmas magazine I have, but it was well worth the purchase.

For one thing, it sports what would make Scott anoint it a worthy cooking resource: ample pictures. One for each recipes, in fact. Oh, does it makes your mouth water to see all those cookies!

Anyway, this particular recipe for Cherry Rum Ribbons sticks out in my mind as a favorite among all the cookies I made for school gifts that year. Mmm.

I love the pink and white stripes, which defy expectations and don't go for a minty taste. Instead of candy canes, I think of old-fashioned hat boxes.

Also, I'm a sucker for rum flavoring in desserts, and I'm a huge fan of dried cherries. I'd never tried the two flavors together, so I was eager to give this recipe a whirl.

These are excellent make-ahead cookies. You can take a midway-through break from the dough as it needs to chill before you do the slicing, and they're good freezers because they have no frosting or delicate bits.

Cookie Tip #15: Don't make your cookie baking a chore! Get into the spirit by putting on your favorite holiday movies or music in the background as you work, and don't be afraid to take a break to watch or dance, even if it means maybe making one less recipe than you intended. Relax a little! The holidays -- and baking -- are meant to be enjoyed.

Cherry Rum Ribbons
Source: Land O Lakes
Yield: 6 dozen cookies

These crisp layered refrigerator cookies are first formed in a pan and then ready to just slice and bake.

  • 1 cup LAND O LAKES® Butter, softened

  • 1 cup sugar

  • 1 egg

  • 2 tablespoons orange juice or water

  • 1 teaspoon rum flavoring

  • ⅛ teaspoon salt

  • 3 cups all-purpose flour

  • ½ teaspoon baking soda

  • ½ cup dried cherries, chopped

  • 3 drops red food color

  • ½ cup coarse grain sugar


Combine butter and 1 cup sugar in large bowl; beat at medium speed until creamy. Add egg, orange juice, rum flavoring and salt. Continue beating until well mixed. Reduce speed to low; add flour and baking soda. Beat until well mixed.

Remove half of dough from bowl. Add cherries and food color to remaining dough in bowl. Beat at low speed until just mixed. Divide each dough in half again.

Line bottom and sides of 9x5-inch loaf pan with waxed paper or plastic food wrap. Press half of cherry dough evenly onto bottom of pan. Top with half of white dough. Repeat with remaining cherry and white dough, pressing each layer firmly and evenly. Cover with waxed paper or plastic food wrap; refrigerate until firm (at least 1 hour).

Heat oven to 375°F. Invert pan to remove dough. Peel off waxed paper. Place layered dough onto cutting surface. Cut loaf crosswise into 1/8-inch slices using sharp knife. Cut each slice in half crosswise. Place 2 inches apart onto ungreased cookie sheets. Sprinkle with coarse grain sugar.

Bake for 8 to 9 minutes or until edges are firm and bottoms are lightly browned. Cool 1 minute; remove from cookie sheets.

Notes:
VARIATION: Chocolate Cherry Ribbons: Melt 1/3 cup real semi-sweet chocolate chips over low heat; cool. Mix into white dough. Continue as directed.

Recipe Tip
Dried cherries are available in the baking section near the dried fruit in the supermarket. Substitute sweetened dried cranberries if cherries are not available.

Recipe Tip
These cookies are perfect for freezing. Place between sheets of waxed paper in container with tight-fitting lid.

Nutritional notes:
Nutrition Facts (1 cookie): Calories: 60, Fat: 2.5g, Cholesterol: 10mg, Sodium: 35mg, Carbohydrates: 9g, Dietary Fiber: 0g, Protein: 1g

Download Cherry Rum Ribbons into MacGourmet.

Cookie Calendar: Spicy Chocolate Cookies

I admit, when I first saw this recipe in Real Simple, I was skeptical. Not just cinnamon, but cayenne and ground black pepper in a chocolate cookie recipe? What were they thinking?

I am more familiar these days with Aztec and Mexican traditions in flavoring cocoa, so it doesn't sound so odd to me anymore. Still, you might want to be selective in revealing the secret of these cookies to people before they taste them. We all have the friend or relative who wouldn't touch a peppered cookie with a 10-foot pole and the one who would get turned on to the cookie just by the idea.

I've heard that brown sugar, like buttermilk, enhances the flavor of chocolate in baked goods. The recipe doesn't specify light or dark brown sugar, but I generally use the light brown kind in those situations. The recipe also doesn't specify natural or Dutch-processed cocoa powder, and as the leavening seems to come from non-chemical sources, I would guess that it does not matter much which you use.

These are an easy slice-and-bake cookie variety. Real Simple suggested in the accompanying article that the dough logs were great to keep around in your freezer throughout the holiday season for any last-minute cookie needs.

Give the Spicy Chocolate Cookies a chance. They are surprisingly delicious and a regular part of my rotation now.

Cookie Tip #9: Time management becomes crucial when baking many different cookies during the holidays. I find it's often best to focus for a couple of hours on just making refrigerator-bound doughs, keeping all the tools and ingredients at the ready to save time. They can rest for hours or days even while I work on other holiday tasks. Later on, with my fridge stocked with logs and rounds, I can focus exclusively on forming and baking cookies, with clear counters to work on.

Spicy Chocolate Cookies
Source: Real Simple

1 ½ cups all-purpose flour
¾ cup unsweetened cocoa powder
½ teaspoon cinnamon
¼ teaspoon salt
⅛ teaspoon freshly ground black pepper
⅛ to 1/4 teaspoon cayenne pepper
½ cup unsalted butter (1 stick)
1 cup brown sugar
1 large egg
1 teaspoon vanilla extract
Combine the first 6 ingredients in a medium bowl. Mix thoroughly with a whisk and set aside. In a mixing bowl, beat the butter and brown sugar until creamy. Add the egg and vanilla extract and beat on high until fluffy, about 1 minute. Gradually stir the flour mixture into the butter mixture until the butter is just incorporated.

Turn the dough out onto wax paper. Use the paper to shape and roll the dough into a cylinder about 10 inches long and 1 1/2 to 2 inches in diameter. Wrap tightly in more wax paper, folding or twisting the ends to seal. Chill for at least 45 minutes or freeze (for up to 3 months) until needed.

Before baking, preheat oven to 375° F. Unwrap the dough (if frozen, let thaw for 5 minutes). On a cutting board, cut it into slices about 1/4 inch thick. Place the slices about 1 inch apart on an ungreased baking sheet. Bake for 10 to 12 minutes. Let cool until the cookies are firm enough to be moved. Transfer to a rack to cool completely.

Download Spicy Chocolate Cookies into MacGourmet.

Cookie Calendar: Chocolate Peppermint Pinwheel Cookies

Just this morning I watched a rerun of Alton Brown making these cookies with a little help from old St. Nick, and considering that today is his special day (St. Nicholas', not Alton Brown's), what better than this to post today?

These cookies are delicious. The dough is rich and produces a cookie with a nice, soft interior. The candy canes provide a crunchy, minty hit as you chew.

They weren't too popular on the cookie tray the year I made them, though, and I think I know why: They were way too big. My cookies, much like the ones on the show, were half an inch thick and about three or four inches wide. I suggest rolling your dough so that you end up with a log with a much shorter diameter. Keep in mind, too, that they will puff a bit while baking.

Cookie Tip #5: For holiday cookie spreads, keep your wee cakes wee. Your guests will want to graze, so they can try several varieties without overstuffing their stomachs, and they'll get turned off by monster-sized, bake-sale-style cookies. Unless you want a lot of leftovers haunting you like the Ghost of Christmas Yet to Come, keep those babies bite-sized.

Chocolate Peppermint Pinwheel Cookies
Source: Alton Brown

  • 1 batch Sugar Cookies, recipe follows

  • 3 ounces unsweetened chocolate, melted

  • 1 teaspoon vanilla extract

  • 1 egg yolk

  • 1 teaspoon peppermint extract

  • ½ cup crushed candy canes or peppermint candies


Divide the dough in half and add chocolate and vanilla to 1 half and incorporate with hands. Add egg yolk, peppermint extract, and crushed candy to other half of dough and incorporate with hands. Cover both with plastic and chill for approximately 5 minutes. Roll out doughs separately to approximately 1/4-inch thickness. Place peppermint dough on top of chocolate and press together around the edges. Using waxed paper or flexible cutting board underneath, roll dough into log. Wrap in wax paper and refrigerate for 2 hours.

Preheat oven to 375 degrees.

Remove dough from the refrigerator and cut into 1/2-inch slices. Place cookies 1-inch apart on greased baking sheet, parchment, or silicone baking mat and bake for 12 to 13 minutes, rotating the pan halfway through cooking time. Remove from oven and let sit on baking sheet for 2 minutes, then move to a wire rack to cool completely. Store in an airtight container for up to 1 week.

Sugar Cookie:

3 cups all-purpose flour
3/4 teaspoon baking powder
1/4 teaspoon salt
1 cup unsalted butter, softened
1 cup sugar
1 egg, beaten
1 tablespoon milk
Powdered sugar, for rolling out dough

Sift together flour, baking powder, and salt. Set aside. Place butter and sugar in large bowl of electric stand mixer and beat until light in color. Add egg and milk and beat to combine. Put mixer on low speed, gradually add flour, and beat until mixture pulls away from the side of the bowl. Divide the dough in half, wrap in waxed paper, and refrigerate for 2 hours.

Preheat oven to 375 degrees F.

Sprinkle surface where you will roll out dough with powdered sugar. Remove 1 wrapped pack of dough from refrigerator at a time, sprinkle rolling pin with powdered sugar, and roll out dough to 1/4-inch thick. Move the dough around and check underneath frequently to make sure it is not sticking. If dough has warmed during rolling, place cold cookie sheet on top for 10 minutes to chill. Cut into desired shape, place at least 1-inch apart on greased baking sheet, parchment, or silicone baking mat, and bake for 7 to 9 minutes or until cookies are just beginning to turn brown around the edges, rotating cookie sheet halfway through baking time. Let sit on baking sheet for 2 minutes after removal from oven and then move to complete cooling on wire rack. Serve as is or ice, as desired. Store in airtight container for up to 1 week.

Yield: approximately 3 dozen, 2 1/2-inch cookies
Prep Time: 15 minutes
Cook Time: 7 to 9 minutes
Inactive Prep Time: 2 hours

Download Chocolate Peppermint Pinwheel Cookies into MacGourmet.

Cookie Calendar: Cardamom Butter Squares

The holidays can be a tricky time to introduce new flavors. People are so caught up in tradition that there can be a revolt if, say, the mashed potatoes are missing on Thanksgiving, or if no one bothered to bake the sugar cookies with butter icing.

By the way, you vultures out there -- you know what the secrets to those particular sugar cookies that show up in our family home are? Pillsbury place-and-bake refrigerated dough and a ton of margarine.

Nonetheless, those sugar cookies are sure to be the first to go, leaving behind the more specialized confections I slaved over for hours and filled with the highest-quality ingredients: pure unsalted butter, exotic spices, dark chocolate, and so forth.

Such is the sad story of my Cardamom Butter Squares, a cookie that I believe must be destined for a comeback soon as I know Scott at least is fond of the warm flavor of cardamom.

If your family hails from the Middle East, Asia, or Northern Europe, you might already have cardamom-spiced treats in your holiday repertoire. These cookies will add a little variety with their unusual square shape and chocolaty topping.

Cookie Tip #4: For the love of butter, use a double boiler to melt chocolate for cookies! I know many people recommend the microwave (though no one in their right mind recommends straight-up on the stovetop), but it's such a fiddly process, heating for a minute, stirring, checking. It's hard to know for sure when to stop if you haven't already done it a million times, but if you heat too much the chocolate turns into a burnt mess. A double boiler doesn't take much more time, and by constantly watching and stirring, you get a better sense of when the chocolate's reached a perfect drizzling consistency. All you need to do to make a double boiler is put about an inch of water in a saucepan and then put a heat-safe bowl on top. The bowl bottom should not touch the water. Bring the water up to a simmer and start melting the chocolate in the bowl. Presto!

Cardamom Butter Squares
Source: Gourmet

For cookies:

  • 3 cups all-purpose flour

  • 1 teaspoon baking powder

  • ¾ teaspoon salt

  • 1 ½ teaspoons ground cardamom

  • ½ teaspoon ground cinnamon

  • ¼ teaspoon ground allspice

  • 2 sticks (1 cup) unsalted butter, softened

  • 1 ¼ cups granulated sugar

  • 2 large eggs

  • 1 teaspoon vanilla


For espresso and chocolate icings:

  • 1 teaspoon instant-espresso powder

  • 1 teaspoon vanilla

  • 1 ½ to 2 tablespoons milk

  • 1 cup confectioners sugar

  • 3 ounces fine-quality bittersweet chocolate (not unsweetened), melted


Special equipment: 2 small heavy-duty sealable plastic bags (for icing, not pleated)

Make cookies:

Whisk together flour, baking powder, salt, cardamom, cinnamon, and allspice in a bowl.

Beat together butter and sugar in a large bowl with an electric mixer at medium-high speed until pale and fluffy, about 2 minutes in a stand mixer (preferably fitted with paddle attachment) or 4 minutes with a handheld. Beat in eggs and vanilla. Reduce speed to low, then mix in flour mixture until just combined.

Form dough into 2 (12-inch) logs (1 1/2 inches in diameter), each on its own sheet of plastic wrap. Use plastic wrap and your hands to roll, press, and square off sides of logs. Chill logs on a baking sheet until slightly firm, about 1 hour, then smooth logs with plastic wrap and flat side of a ruler to achieve straight sides. Chill logs on baking sheet until firm, about 1 hour.

Put oven racks in upper and lower thirds of oven and preheat oven to 350°F.

Cut enough scant 1/4-inch-thick slices from a log with a knife to fill 2 large ungreased baking sheets, arranging slices about 1 inch apart (chill remaining dough, wrapped in plastic wrap).

Bake cookies, switching position of sheets halfway through baking, until edges are golden, 10 to 12 minutes total. Cool on sheets 3 minutes, then transfer to racks to cool completely. Make more cookies with remaining dough on cooled baking sheets.

Ice cookies:

Whisk together espresso powder, vanilla, and 1 1/2 tablespoons milk until espresso powder is dissolved, then add confectioners sugar and enough additional milk to make a thick but pourable icing. Spoon into a sealable bag and snip 1/8 inch off a bottom corner.

Spoon melted chocolate into another sealable bag and snip 1/8 inch off a bottom corner.

Pipe some espresso icing and chocolate over each cookie and let cookies stand on racks until icing sets, about 2 hours.

Notes:

Yvonne M. Parnes of Batavia, Ohio, got the recipe for these rich, buttery cookies in an e-mail from the McCormick spice company. We like them plain, but drizzled with espresso icing and bittersweet chocolate, they are truly out of this world.

Cooks' notes:

  • Dough logs can be chilled 5 days or frozen, wrapped in a double layer of plastic wrap, 1 month (thaw in refrigerator just until they can be sliced).

  • Cookies (with or without icing) keep, layered between sheets of wax paper or parchment, in an airtight container at room temperature 1 week.


Download Cardamom Butter Squares into MacGourmet.